|
11th Dec 2009
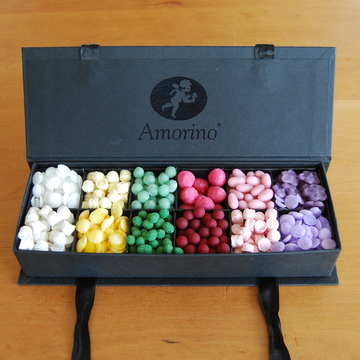
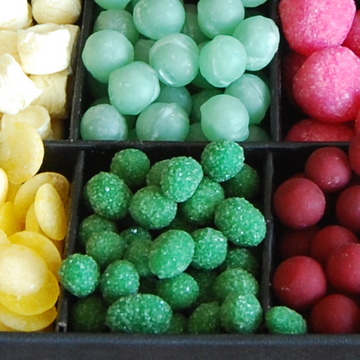
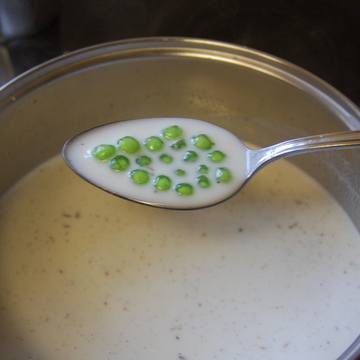
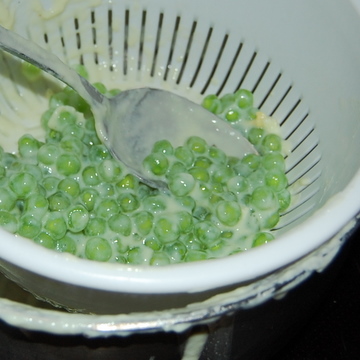
Tamsin: We were discussing having an exhibition at my museum entitled ‘Beautiful Things’ – there would be nothing that connects the artefacts together except their beauty, which for most, was lovingly bestowed on them by the skilful hand of their creator. I was reminded of the joy that beauty can give when we walked past a shop window in Paris. There was what can only be described as a treasure trove of beautifully-formed jewel-like sweets, shining out from their alluring black boxes.
These were definitely ‘bon-bons’ for the connoisseur - confirmed for me when next day I was presented with a box by my lovely friend and so could sample the contents.
My favourite was the glittering green pearls named ‘Graines de cumin’ which turned out to have the hidden gem of a cumin seed in its centre – a surprisingly pleasant taste when wrapped in sugar, and its enjoyment made that much more by the beauty of its ‘petit’ nature. Forget the ‘retro’ sweet craze, these are the real sweet adult indulgence.
3rd Dec 2009
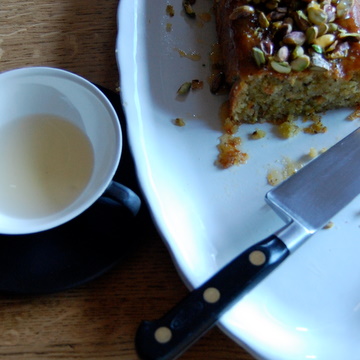
Jane: Is this the most delicious cake ever? The grown-ups all think so and, surprisingly given the general nuttiness and lack of gooey icing, the children are pretty keen too. This is a good rich winter treat, which can even be substituted for pud with a dollop of cream on top. When I’m feeling lazy I forget about the vanilla pod and the cake is just as tasty…
For the cake:
270 g unsalted butter 1 lemon 1 vanilla pod (optional) 100 g blanched almonds 120 g pistachios 250 g caster sugar 4 large eggs 40 g plain 00 flour For the topping: 1 lemon 50 g caster sugar 60 g pistachios Heat the oven to 150 degrees C/Gas Mark 2. Line a loaf tin 22 x 12 x 6 cm deep with greaseproof paper, and grease well with 20g of the butter. Soften the remaining (250 g) butter. Zest the lemon. Split the vanilla pod (if using) and scrape out the seeds. Grind the almonds and pistachios together (I use the hand blender with which I mush up baby food). Beat the butter and sugar together until fluffy. Beat in the eggs one at a time. Add the lemon zest, vanilla seeds (if using), then fold in the nuts and flour. Spoon into the prepared tin and bake for about an hour (start checking after 45 minutes). Push a skewer into the cake and if it comes out clean, it’s ready. Leave to cool in the tin, then turn out. For the topping: Zest and juice the lemon, put both into a pan with the sugar, and boil until thick (a few minutes). Halve the pistachios and stir into the sugar sauce, then pour the topping over the cake. This is taken from River Café Cook Book Easy by Ruth Rogers and Rose Gray (though I got it from a Guardian supplement of the same name, in 2003!). 20th Nov 2009
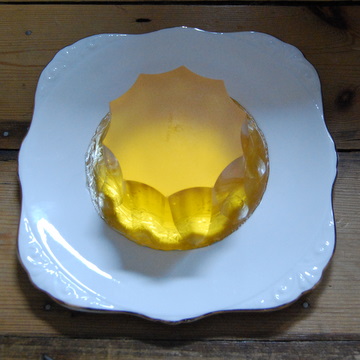
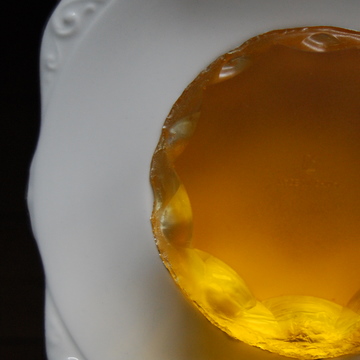
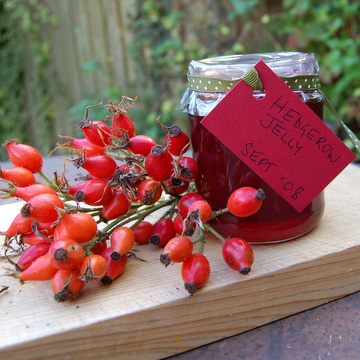
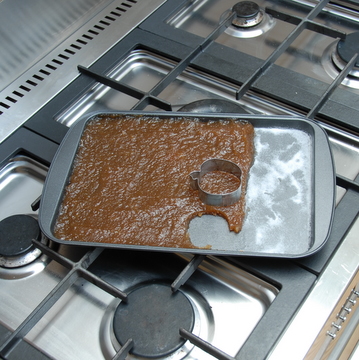
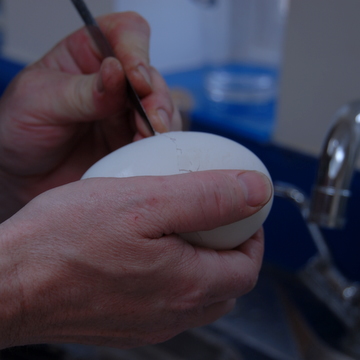
Tamsin: After 3 weeks and one failure I have finally completed my jelly and am feeling rather pleased with myself. There are many weird and wonderful challenges that my job, as a museum education officer, gives me and this was one of them. We are putting on a Dickens' Christmas where the so-called ‘father of Christmas’ – Charles Dickens – takes centre stage. For one of the exhibitions I am laying the table with the meal that Charles and his wife would have eaten at Christmas. The stumbling block is that I am not allowed to have any real food within the galleries – it all has to be fake. There is much that you can do with salt dough (mince pies, sugared almonds) and newspaper with masking tape (goose, Christmas pudding) but neither of these quite work when you are trying to fake a lemon jelly. After much thought I came across a product that is used in artificial flower arrangements to imitate the water in the vase. It's a plastic resin that sets rock hard but remains translucent. I ordered a kit but was dismayed to find that it took 21 days to cure and I had a tight deadline.
Luck was with me as I read that you could quicken the process by heating the jelly at 60 degrees C for 15 hours – a much better option. Well, it was until I opened the oven door halfway through the allotted time and found a melted mould with a rather misshaped jelly seeping out. It had a genuine melted jelly feel to it but not quite the perfection that was needed for Dickens' festive table. Luck was with me again as I had only used up half the mixture so, putting in a few more drops of yellow ink and rushing down to town to purchase a further jelly mould, I began again. This time patience was needed – I placed the mould on top of a radiator for a few days then put it in a very low oven for a few hours. The excitement was immense as I peeled back the mould to reveal the gemlike object, and even despite the fact that it had the words ‘made in China’ etched on the top from the mould, pride welled up inside me.
To see my jelly, pop in to the Cambridge & County Folk Museum, where the exhibition will run throughout December. But come especially on Saturday 12th December when the whole place will be oozing with Dickensian style, with crafts to make, readings, carols, sweetmeats, games and even the odd humbug, to show you how Charles really liked to spend his Christmas. 10th Oct 2009
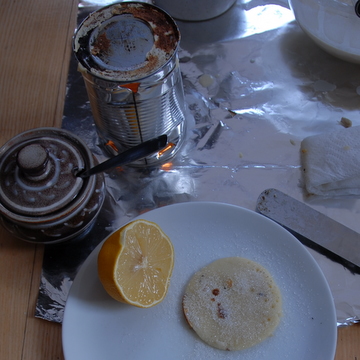
Tim: Every Sunday we have a big family breakfast in bed. French toast is popular, but the house favourite is definitely pancakes with fruit and maple syrup. A while ago we started experimenting with shapes, like pancakes in the shape of each person’s initials. Now we’ve gone a step further by adding colour to create more ambitious pancake art.
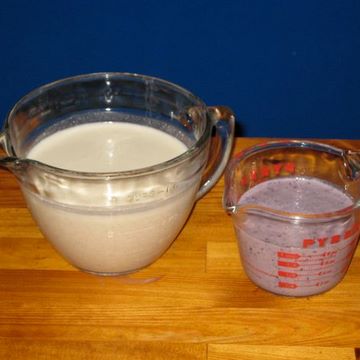
When the batter is ready we divide it into separate jugs ...
...adding a handful of fresh blueberries to one and blending them in with a hand mixer or food processor.
Pouring from the jug, or else using a turkey baster, start with the coloured batter and make a shape or write a letter. Within a few seconds it will have set enough to fill in around it with the plain batter.
After that has cooked you flip the pancake as normal to cook the other side ...
...flipping it once again as you put it on to the plate before drowning it with maple syrup (or lemon juice and sugar) and dusting it with icing sugar.
To write names or do more complicated designs we’ve found it is easiest to start making a regular pancake. When it is almost done on one side, lift it out of the pan on to a wooden chopping board where you can use a sharp knife to cut out shapes or letters. After carefully laying the pancake back into the pan you simply fill in the gaps with coloured batter using the turkey baster, adding small pieces from the cutouts to fill in the centre of letters like ‘A’ or ‘O’.
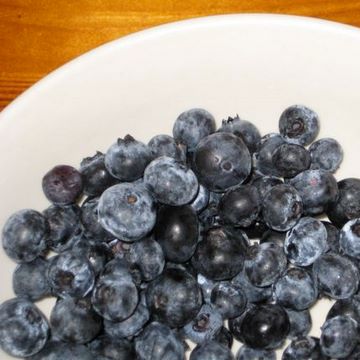
We use blueberries because where we live they are plentiful in summer, but any berry fruit would work and while fresh is obviously best, frozen fruit is just as effective.
The blueberry mixture makes delicious pancakes (even if you decide not to make shapes) and is a good way of sneaking fruit into fussy kids. For a pancake recipe click here.
27th Sep 2009
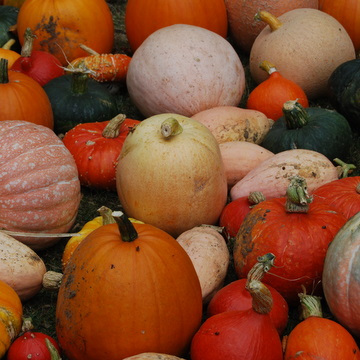
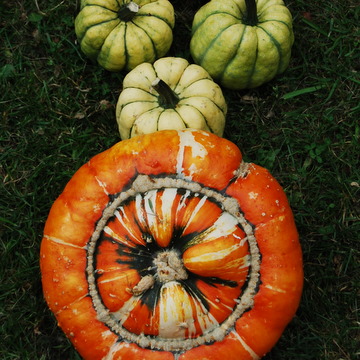
Helen: This time of year the larder is heaving with squashes – pumpkin, courgette, yellow crookneck, acorn, butternut, ambercup, hubbard, banana, trumpet, solaire, pattypan, spaghetti, fetuccini and so on. We saw an amazing display of squashes and pumpkins at Thornage Hall. Have you ever seen such a variety?
Tamsin says her favourite tasting squash is one that is just plain baked, cut in half, seasoned with a tad of salt and pepper and massaged with olive oil, put on an oven tray and baked for 30 to 60 minutes depending on the size and texture of the squash – so not an exact science. The most important thing is to bake them until they come out all toasty. Squashes cooked in this fashion are one of the best winter warmers.
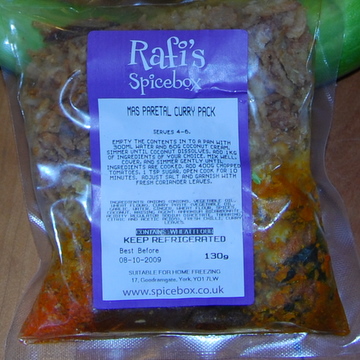
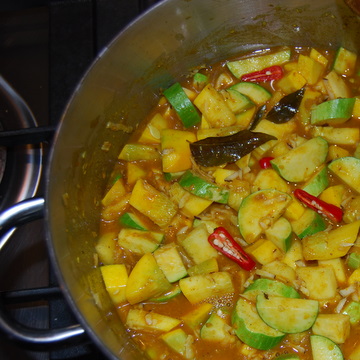
JOE’S RAFI-EMBELLISHED SQUASH EXTRAVAGANZA Joe: This is how you make an extraordinary squash extravaganza. You will need to visit Rafi's store and select one of their homemade curry packets. Go to their on line store here or have a person pop to the shops opposite York Minster and pick one up fresh from the shop. For the squash challenge, I chose a special family recipe called MAS PARETAL. Open the yummy ingredients packet from Rafi's and put it in a capacious pot on the stove and warm gently with 30 ml of a good vintage water from the tap.
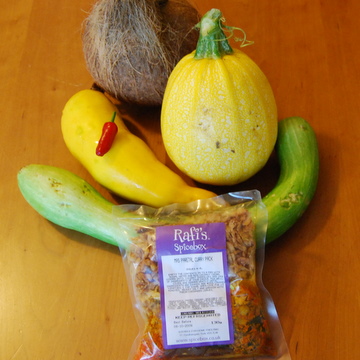
Next I went to the garden and selected the first chilli of the season. Then I photographed this delightful vegetable with the companions for this recipe: three squash, one coconut, one chilli.
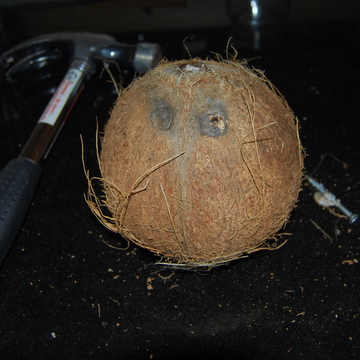
Cut the squash into small slices, add to the curry mix and stir well. Slice the chilli and add a second if you want to blow your head off. As the squash starts to cook you need to tackle the hairy fruit or seed or nut that is called the coconut.
Breaking into the coconut requires specialized skills and equipment. There are three eyes at the top, but only one will work! Whack a big hole through it and pour out the milk into the squash pot. Then comes the fun part. Wrap the nut in a cloth and let out your anger with a hammer, don’t hold back! Once it is well and truly smashed (but not too small so that chunks of coconut can be hand-held) take off the outside shell and grate the inner coconut flesh. Use the larger side of the grater to shred the coconut and add all to the curry mix.
Cook for 15 minutes stirring every so often until the squash is squashed in the mix and eat. Recommended: sides of mango chutney, lime chutney, and yogurt liberally sprinkled with shredded cucumber.
Ingredients:
1 Rafi's curry 30 ml fresh tap water 3 squash 1 chilli 1 coconut 17th Sep 2009
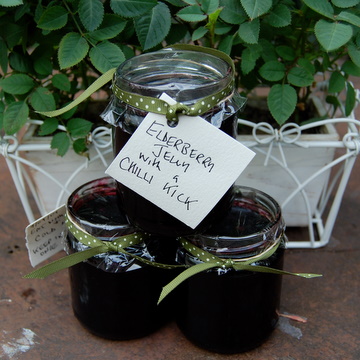
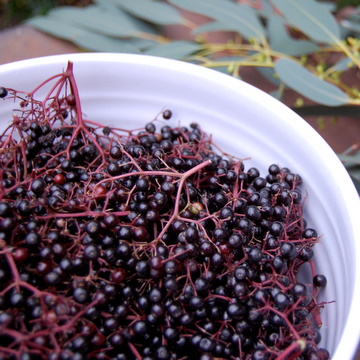
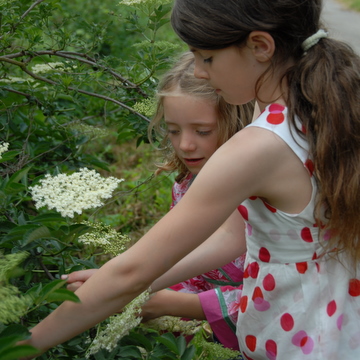
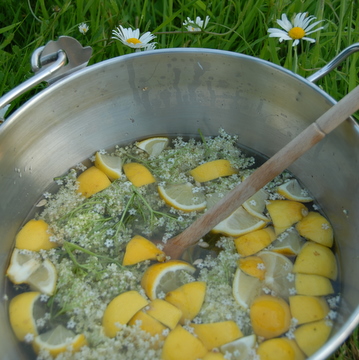
Jane: There’s a sprawling elder bush just over the river from us which has been dripping glistening black elderberries for the last couple of weeks, desperate to be made into elderberry jelly. So finally we obliged. But instead of spread-on-bread-jam I wanted to make something with a kick, that you could eat with cold meats and cheese. Aha! Just add chilli! Surprisingly, the kids loved this jelly, and what’s more it offers fantastic protection against winter colds and flu – take a daily dose as soon as you feel a sniffle coming on.
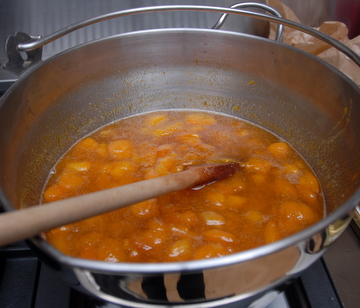
This made nine 8oz jars, so scale down as you need: 1.2kg elderberries, stripped from the stalks 4 Bramley apples juice of 3 lemons 2 tsps crushed dried chillies (this makes it pretty tangy but you can add more if you like) 1.5kg preserving sugar Put the elderberries in a preserving pan with the apples, chopped into quarters (including skin and cores – elderberry is not high in pectin and this helps with setting). Add the lemon juice, chilli and 1.2 litres cold water. Bring to the boil, and simmer for about 20 minutes, stirring occasionally, until the elderberries and apples are soft. Strain through a jelly bag, leaving to drip until all the juice is collected (you can throw away the pulp). Put the liquid into the pan with the sugar. Bring slowly to the boil, then simmer until it reaches setting point at 105ºC (use a jam thermometer). Spoon into sterilised pots, cover with a waxed disc and cellophane round. 9th Sep 2009
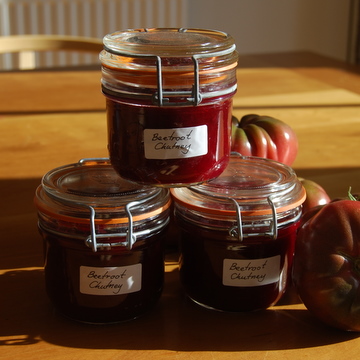
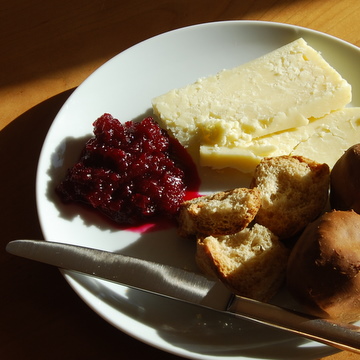
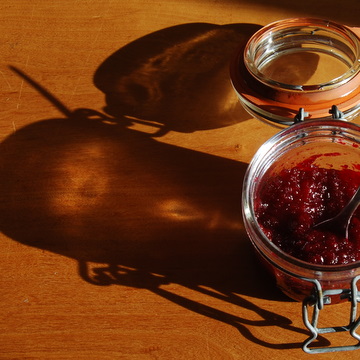
Tamsin: This is the season when I seem to be peeling and chopping whenever I have a free moment in an attempt to preserve all that the garden is producing. I've made many different types of chutney in my time but this year's beetroot one is truly scrumptious - deemed so delicious by my husband that he immediately banned me from giving any of it away!
He is right though - it is so scrumptious that I want to keep it all to myself and am already getting anxious that we are wolfing through the pots too fast. My favourite accompaniment to it is a slice of Cheddar and a Dorset Knob (I managed to get a packet of these teeth-crunching snacks despite a countrywide shortage, something to do with the new machinery at the factory. So if you see a pack anywhere, grab it.) If you want to give yourself something to look forward to at lunchtime, try out this recipe and the late summer will be with you for that much longer...
Beetroot Chutney
1kg raw beetroot 350g onions 450ml white vinegar 350g cooking apples 1 tsp pickling spice 4-6cm piece of root ginger 1 tsp ground ginger 1 lemon (juice and rind) 350g sugar Wash and cook beetroot. When cool, peel and dice. Peel and dice the onions, put them into a large saucepan with a little of the vinegar, and cook until soft. Wash, peel, core and chop the apples, add them to the pan. Tie the pickling spices in a muslin bag and add it together with half the remaining vinegar to the onions and apples. Grate the root ginger and add this together with the ground ginger, grated lemon rind and juice. Cook until very soft, stirring occasionally and taking care not to burn. When ingredients are cooked add the remainder of the vinegar and the sugar, heat gently, stirring well until the sugar had dissolved. Boil steadily until the chutney is thick. (I then whizzed it with my hand held blender to give it a smoother finish, but the consistency is up to you.) Pot and seal in jars that have been pre-heated in a low oven. 21st Aug 2009
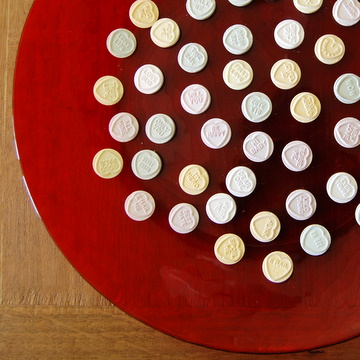
Tamsin: Love Hearts come in six different colours and flavours, they can be sucked or chewed and are the choice of sweet for many a pre-pubescent girl. I remember the seriousness that surrounded the sharing of a packet at school, who should get what and making sure that if offered to a boy the message did not place you in an embarrassing position.
I had assumed that there were, at the most, about a dozen different messages that were stamped on the front of the hearts but while browsing the Wikipedia entry I was surprised to see that there were over 120 possible Love Heart messages. To see if this was true (and why shouldn’t it be?) I rushed up to our corner shop and purchased three packs. Carla’s eyes lit up at the sight of them and she was rather disappointed when I forbade her from eating any of them except those with a repeated message.
How could I have doubted? I only got nine repeated messages out of 60 Love Hearts. Still, I am unsure as to how many of these were around when I was young – especially the ones that read ‘E-mail Me’. How young love has moved on. 18th Jul 2009
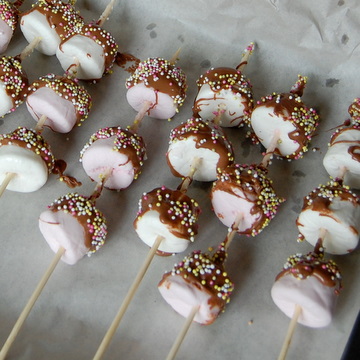
Jane: Mike has just delivered American Girl to us, a fab US mag quite unlike anything we have in this country (in so much as there are no boys/first kisses/fashion/my-best-friend-is-not-talking-to-me teenage traumas). Does that make it sound dull? It’s not. It’s full of energy, ideas, quizzes, crafts and funny, engaging features and stories. And cooking – this month frozen lollies of the most wacky and wonderful kind. The Peanut Brrrr was a step too American for us but we loved the idea of Flurry Float (frozen grape juice around vanilla ice cream to make a mivvi), Polar Pops – basically frozen Swiss roll on a stick, and Chilly Vanilly – fresh berries in frozen vanilla pudding.
But today we choose to make Marshmallow Snowballs (see recipe here), which are super quick and easy. We started after a lazy, late Sunday breakfast, with everyone still in pyjamas, but by the time the Snowballs emerged from the freezer an hour later at 11.30am, to be dipped in chocolate and hundreds and thousands, we were fully dressed and ready to get marshmallow munching…
20th May 2009
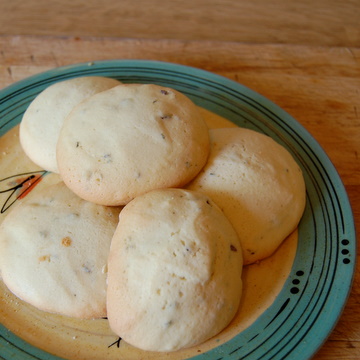
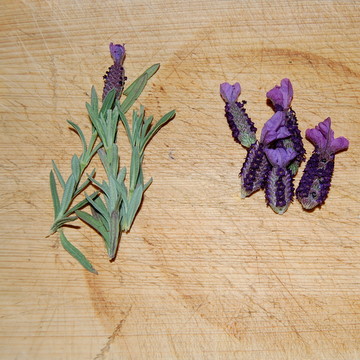
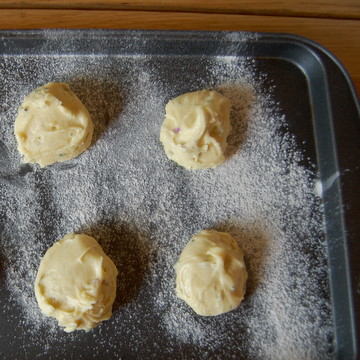
Jane: Edie brought home some Tudor biscuits she’d made at school which were unusually delicious – halfway between biscuit and cake, with a firm yet spongy bite and a slightly perfumed rosewater tang. They’re incredibly easy to make (obviously why they do them at school) because they don’t need rolling and cutting – you just drop spoonfuls of mixture on to a baking tray. To make them a little summery (as it is Chelsea Flower Show week) I added some French lavender leaves and flowers, which everyone said tasted like cinnamon when the biscuits were cooked. Very strange...
Lavender Tudor Biscuits 125g caster sugar 2 egg whites 1 egg yolk 1 tbsp lavender leaves, chopped 2 tbsp butter, melted 125g plain flour 60g semolina (or something to give bite – could be ground almonds, polenta, ground rice etc) 1½ tsp rose water 2 tsp lavender flowers
Heat the oven to 400ºF, 200ºC, and grease and flour two baking trays. Whip the egg whites and sugar together until fluffy. Stir in the egg yolk, lavender leaves, butter, flour, semolina and rose water. Finally add the lavender flowers and stir gently until mixed. Drop the mixture in large teaspoons on to the baking trays, leaving enough space for the biscuits to spread. Bake for 8-12 minutes, until light gold in colour.
King Henry VIII loves those lavender biscuits...
16th Apr 2009
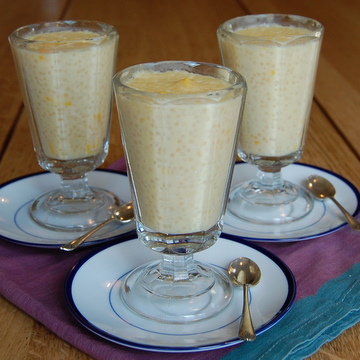
Jane: It all started with sago. A few weeks ago in a foreign hotel, I tasted my first sago pudding in two and a half decades. It was exquisite: a tiny bowlful of opalescent sago pearls and fresh mango slivers drifting in fragrant coconut milk. All those memories of stodgy, evap-milked, school frogspawn vanished instantly. This was a sago pudding I (and I hoped the kids) could learn to love. If only I could find out how to make it. Back home, I went on a search for sago. No luck in any of the big supermarkets or health food stores. Even in the foreign food shops I could only find weird hybrids. The version which looked most like sago and advertised itself as ‘premium small sago’ was actually made from potato starch (whereas sago comes from sago palm stems). ‘New Sago’, a Chinese, fast-cook variety, was made from tapioca (a starch derived from cassava roots, not sago palms). I bought them both anyway. Plus the large, green ‘Premium Quality Tapioca Pearls’, dyed with pandan leaf extract so they looked just like bullet-hard dried peas.
I found a chilled mango sago pudding recipe on the internet and started simmering the tiny potato starch pearls, adding coconut milk and mango, all the time hoping for manna. The recipe said it would make enough for four people but I managed to get eight bowlfuls, and cooled them as directed so they stood stiff with a thick, yellowish milk skin on top, the little potato pearls shining through, before proudly presenting them to the family as pud. ‘Sordid,’ ‘Solid starch’, ‘Godawful’ were a few of the kinder comments. Even I found it difficult to swallow more than two mouthfuls of this cold, starchy wodge. Into the bin it went.
But I was still determined to produce a decent frogspawn pud. I’d used the potato pearls – now it was time for the green tapioca (which I remembered as tasting similar to sago) to grace our dinner table. It was Easter, we were staying with my parents, and opposition was stiff: every time I mooted the green tapioca pud option, there was an outcry from the junior members of the family.
Egged on by Mal, the kids hid the tapioca from me. It took a while but I eventually found it and shrieked in triumph, which brought them running – they chased me upstairs all the while trying to grab the packet. I locked myself in the bathroom, panting, clutching the tapioca to my chest. Where was I going to hide it? In the cistern? Too soggy (and unhygienic). In the airing cupboard? Too easy to find. So I chucked it out on to the flat roof outside, thinking they’ll never find it there. They didn’t. The monstrous green packet languished there until the evening, when the anti-tapioca rebellion had muted a little and I could bring it back in. But the window was too small for me to climb through, so Edie had to jump on to the roof to retrieve it (so kind, given her aversion to milky puddings), while I mused on what further ridiculousness my sago trip would take us. A few nights’ later, I felt strong enough to make the green tapioca. On the translated-from-Thai packet, it said: ‘Put Tapioca Pearl [sic] in boiling water and stirs [sic] lightly until look [sic] clear.’ I boiled it for about 20 minutes. Still rock solid. Thirty minutes: the edges were jellylike and chewy but the insides tough as old Doc Martens. Forty minutes: enough! We’d eaten our main course ages ago, and here was I still boiling the tapioca. Fine, it was a bit stodgy and solid in the middle, but I reckoned it would continue cooking while I made the custard.
So I drained the water off the green gunge (green slime was drooling from the pearls, worth knowing if ever you want to make your own edible snot for Halloween). I added milk and sugar, brought the mixture to a boil, and stirred in the eggs. It thickened a bit until it looked like cream of spring veg soup, though the green tapioca itself was still tough and gloopy (how long does this stuff take to cook?). I dished it up anyway, straining it into the children’s bowls so they got pure, sloppy custard, while the grown-ups tried (and failed) to munch their way through the still chewy green pellets. Awful. Inedible. Grim.
I’m not sure about the moral of this story, apart from avoid tapioca, sago, and other foreign starches at all times if you want a happy family. But I know what I tasted in that foreign hotel those few weeks ago, and it was gorgeous. For that reason alone, the sago grail is still on my mind…
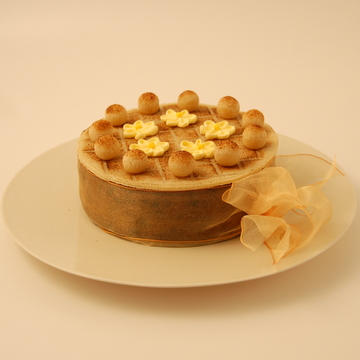
11th Apr 2009
This traditional and delicious cake is fun for all the family to make. For the marzipan For the cake NB: The marzipan topping contains uncooked eggs. 1 Preheat the oven to 180 degrees C, Gas Mark 4 (adjusting for fan oven). Grease and line the base and sides of the baking tin using baking parchment. To make the marzipan 2 Place the caster sugar in a bowl with the ground almonds. Sieve the icing sugar over and mix all together. 3 Whisk a large egg and add it to the dry ingredients. Mix then knead the mixture until a soft dough is formed. 4 Take one-third of the marzipan and, on a board lightly dusted with a little icing sugar, roll it into a circle, using the base of the tin as a template. This will go in the middle of the cake. Put the marzipan in the fridge to cool while you make the cake. To make the cake 5 Cream the caster sugar and margarine in a bowl, until pale and fluffy. 6 In a separate bowl, lightly beat together three large eggs, and stir into the creamed mixture a little at a time. 7 Add the flour, polenta and baking powder to the mixture and stir gently. Then add the sultanas, raisins, currants and candied fruit and mix until combined. 8 Spoon half the cake mixture into the lined tin. Put the rolled layer of marzipan on top, then cover with the remaining cake mixture so you have a sandwich effect. 9 Turn down the preheated oven to 150 degrees C, Gas Mark 2, put the cake in and cook for 1½ hours. Check after an hour and if the cake is browning, place a double layer of baking parchment on top. The cake is ready when a skewer inserted in the middle comes out clean. Leave to cool in the tin, then turn out. To decorate the cake 11 Using a wooden skewer, mark the marzipan top with several wide criss-crossed lines. 12 Form the remaining almond paste into mini eggs or balls (it is traditional to have 11 but you can choose how many you want) and arrange around the edge of the cake. 13 Place the cake under a very hot grill for a minute or so until the topping goes a lovely toasty brown. 9th Feb 2009
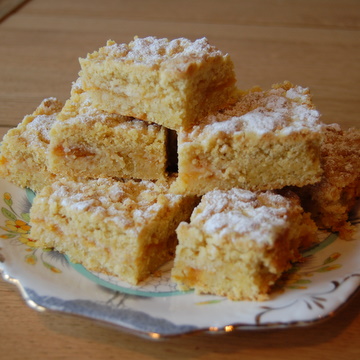
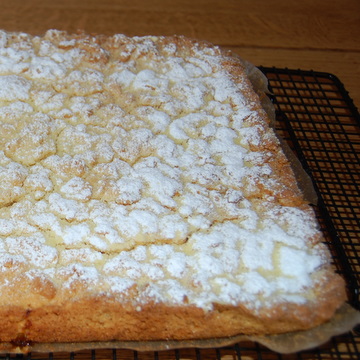
Jane: This
is the time of year for lovely comfort puds like crumbles and roly polys and
here’s a fantastically stodgy teatime equivalent beloved of all members of our
family. It’s a heavyweight buttery shortbread with a sweet and fruity layer
that makes you think spring might be on the distant horizon. It’s also good to
make as a traybake for school dos as both children and adults like it a lot,
and you can make 24 or so slices in one batch. 500g unsalted butter, at room temperature 4 large egg yolks 200g caster sugar 450g self-raising flour 50g polenta Pinch of salt 400-500g apricot compote (I use Bonne Maman’s big pots – the rhubarb is delicious too – but you can make your own with whatever fruit is to hand) Icing sugar for dusting
In a large bowl, beat the butter until pale and soft. Add the egg yolks and sugar, and beat well until light and creamy. Add the flour, polenta and salt and stir in with a metal spoon or on the lowest speed of your electric mixer. The mixture will be very thick – almost too thick to stir. Divide into two batches, wrap in cling-film and chill in the fridge for half an hour or so.
Meanwhile, line a 30 by 23 by 4cm baking tray with baking parchment.
Take one batch of dough from the fridge, and grate the mixture straight into the tin, using the largest holes on your grater – it will come out like fat worms. Press lightly down into the corners and to make sure the layer is level. Spoon over the apricot compote evenly. Then take the other batch of dough from the fridge, and grate it evenly as before over the apricot layer. This time don’t pat the dough down – it looks better if the top surface is a little crumbly and uneven. Bake at 175 degrees C/Gas Mark 4 for about 40 minutes or until the shortbread has taken on a golden colour. As soon as it comes out of the oven, dust heavily with icing sugar. Cool on a rack, then cut into squares or slices. 16th Jan 2009
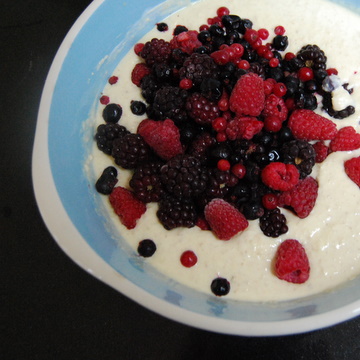
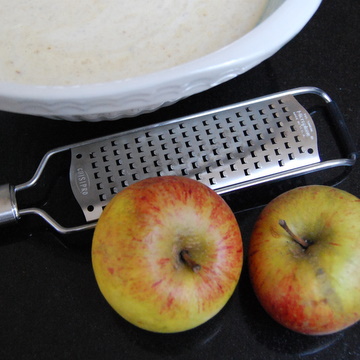
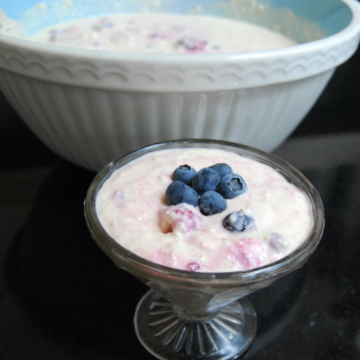
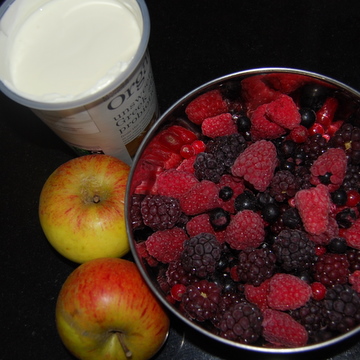
Tamsin: I am not that good at breakfast. Cooking early in the morning is not a good start for me (which is a pity for my growing son who can think of nothing better than an English fry-up to start the day). My favourite beginning is a fresh fruit salad but even that seems like an awful lot of hard work when your eyes have yet to focus from their night of slumber. I think this comes from being spoilt as a child by my father who prepared us breakfast each day. All we had to do was lay the table and enjoy. Thank you dad, I look back at those ‘breakfast all prepared’ days with belated appreciation.
There was a rota to my father’s breakfasts – Monday, scrambled egg; Tuesday, grapefruit; Wednesday, boiled egg etc. Then, sometime in the mid-70s, he discovered muesli. This was not the sleek sweet versions which adorn our shelves now but the pure homespun variety consisting of a few dried oats scattered with raisins, hazelnuts and maybe a cut-up apple. I detested the floury taste of the dried oats with the cold milk and still do.
I was therefore surprised to find a muesli that was delicious and which despite containing oats did not ‘flour’ on the palette. The downside to my discovery was that I only ever came across it in hotels in Europe. So it was with great delight that on turning the pages of our local magazine last week I came upon a recipe for the very muesli I coveted – Bircher muesli.
Bircher Muesli 10th Jan 2009
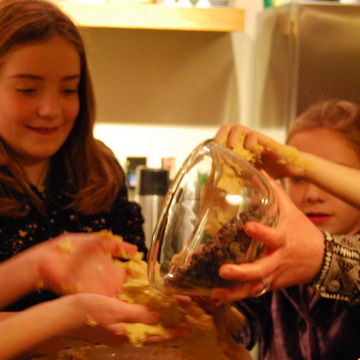
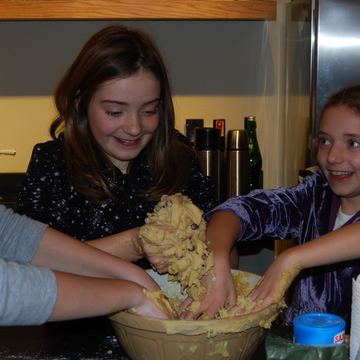
Helen: Carla was very keen to make chocolate chip cookies during the school holidays and I was even keener. The cookies travel very well and we have tested out their flavour at several locations. Firstly, in the bowl in raw state rather a lot of the cookie dough was eaten by Carla, with assistance from Maudie and Edie. It must have tasted good, because around 10% of the mixture disappeared. Secondly, once cooked, Joe tested the first cookie while still hot from the oven. This test showed that flavour is obscured by heat and does become stronger once the cookies have cooled and the choc drops are no longer in danger of burning your tongue. Thirdly, the cookies were taken to the beach to experience the seaside; a Fourthly, a batch of cookies (no salt version) was mailed to my father in a tupperware box layered in greaseproof paper and topped with bubble-wrap and not one cookie was broken by the postie. My father gave evidence over the telephone that even when he finished them on the fourth day, they still maintained flavour and texture, and so now we know that this recipe for cookies does not go stale when posted a distance of 90 miles and consumed in a leisurely manner over a period of days rather than hours. This range of taste tests has been fairly comprehensive, and shows that next time Carla and I can be more adventurous and post cookies to a range of destinations! The ingredients are given in US cup quantities – this recipe is easiest to make if you buy a cup measuring set, usually about £3 at a UK supermarket. Makes about 40 cookies. 2¼ cups plain flour 1 tspbaking powder 1 tsp salt, can reduce or avoid if necessary for heart healthiness 1 cup butter, softened to mushy consistency ¾ cup granulated sugar (can use brown) ¾ cup soft brown sugar, squashed down 1 tsp vanilla extract, posh stuff tastes best 2 large eggs, whisked 2-3 cups dark chocolate chip cookies (or mix with milk drops) 1 cup chopped nuts (optional: pecans, walnuts or pistachios are best) Pre-heat oven to 180ºC/350ºF. Mix together the flour, baking powder and salt in a small bowl. Churn together the softened butter and both sets of sugar in a very large bowl. Needs some elbow work to make smooth or you can use an electric mixer if you have to conserve your energy and are keen on a very light cookie texture. Add the vanilla extract and beat in. Lastly, whisk the eggs and slowly add in to the mixture which will make it very gooey. Gradually add the flour mixture to the butter mixture and stir in. Only once your mixture looks like cookie dough and is a butterscotch colour, is it time to add the special ingredient of chocolate drops (minimum recommended 2 cups, maximum 3 cups; and dark chocolate drops have stronger choc flavour post baking than milk chocolate drops, so this has to be carefully thought through before selection of drops).
You will see that with three sets of helping hands it may be very hard to get the required quota of choc chips if your helpers consume too many choc chips before they reach the cookie mixing bowl!
Using a soup spoon, scoop out one spoonful of dough per cookie which will make them to fit an American mouth size which equates to three bites for a typical British adult. If you are baking them for toddlers, use a teaspoon of dough per cookie so they are for small mouths. And if you wish to add nuts, this is the time to push several into the top of each cookie. Bake for 8 to 11 minutes, then remove from hot oven tray immediately and put on a wire rack to cool. If you like your cookies to be American style and sticky inside, then take out of the oven at 8 minutes because by 9 minutes they will be firm and by 11 minutes they will be toasty. So check with your consumers which texture they like best. All taste extraordinarily good! In this picture, we added some pistachios to the cookies just before they were popped in the oven. This batch of cookies did taste different because they were a no-salt version so we could share half of them with my father who is not allowed salt since his heart operation. (It did not make a big difference to the taste of the cookies.) Also, these cookies have been baked for 10 minutes to be of firm texture to withstand packing in tupperware to travel as going-home presents and for posting to my father in Oxfordshire. The cost of posting a box of cookies packed in tupperware and padded envelope in Britain was £2.50 first class: posting at 4pm in central Cambridge they were then delivered the very next morning to rural Oxfordshire and remained in pristine condition with hardly a crumb dislodged. So this proves that chocolate chip cookies make an excellent choice for a posted present!
28th Nov 2008
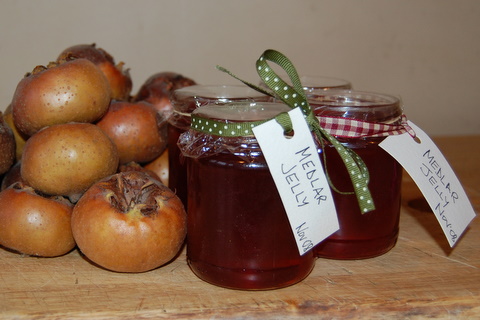
Jane: My neighbour has a rarity in his front garden – an exquisitely shaped medlar tree which produces prolific late-ripening winter fruit. You just shake its leaf-bare branches and a profusion of hard, yellowy-brown, inedible fruits hits you on the head. Inedible at least until they are made into jelly, cheese or ‘bletted’ – stored until they go brown and soft, internally fermenting (they look as if they are rotting) until the flesh turns to a fragrant, slightly cloying-tasting pulp. Given this, you can understand why medlars are not popular today, but they were considered a delicacy in Victorian times, the bletted fruit scooped out and eaten raw with cream and sugar as a winter pudding. The fragrant tartness of medlar jelly, however, is extremely good eaten with poultry or game. Jane Grigson does a very straightforward recipe: cut up your medlars, cover with water and simmer until the fruit turns to a pulp. Strain for a few hours over a jelly bag (don’t squeeze if you want a clear jelly), add 500g sugar for each pint (600ml) of medlar juice, boil, then pot once setting point is reached. I used a jam thermometer and potted at the setting point of 105 degrees C – a big mistake, as once cool, the medlar jelly was still liquid. So I boiled it again to slightly above setting point: again the jelly was too runny. The third time, I added the juice of a lemon, thinking it might improve the set, and boiled, this time doing the saucer test (putting a teaspoonful of boiling jelly on a cold saucer – if the jelly is ready, the surface wrinkles when you push a finger over it) which I normally can’t be bothered with. Finally, the jelly wrinkled in the saucer at over 106 degrees C – it was done.
Given three boilings, you could play squash with a ball of this medlar jelly but, even though the texture is rubbery, the taste is still flavoursome. I had some last night with roast chicken. 30th Sep 2008
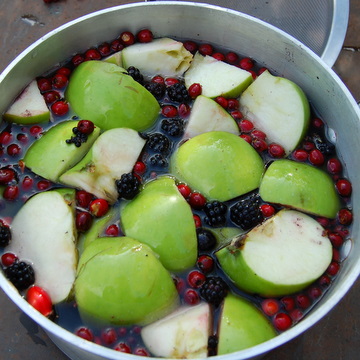
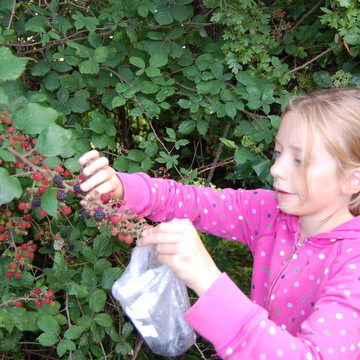
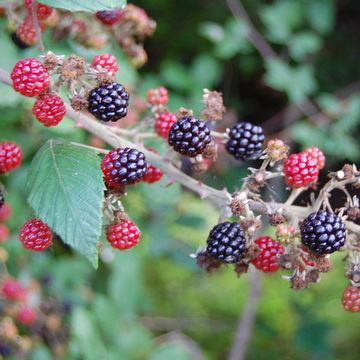
Jane: Last weekend the children were camping, so Mal and I went hedgerow picking with a step ladder. Ooh, it made life much easier. We could reach all the sloes and lovely juicy blackberries that everyone else had left behind. I’ve just bought a fantastic book, Hedgerow Medicine, which shows you how to make teas, tinctures and balms from the plants that are all around us. But I started off with hedgerow jelly:
Hedgerow Jelly This has a lovely delicate flavour and despite the sugar can even be called healthy (hawthorn especially is good for lowering blood pressure and cholesterol). I used a mix of sweet (blackberry), bitter (sloes) and sour (rosehips, hawthorns) flavours but you can use any hedgerow fruits including rowan berries. Always use the same amount of cooking apples as other fruit: they provide the pectin to set the jelly. 1kg cooking apples 300g blackberries 250g sloes 100g elderberries 150g hawthorn berries (haws) 200g rosehips About 2 litres water, to cover 2kg granulated sugar Wash the apples and cut into big chunks, leaving the skin, pips and cores on. Strip the fruit from the stalks (no need to top and tail) and rinse. Put all the fruit into a big preserving pan, and cover with water. Bring to the boil, then simmer until the fruit is soft, about 45 minutes to an hour. Put the mixture into a muslin-covered sieve or three-legged jelly bag and leave to drip into a pan. This might take an hour or more but don’t hurry it – if you squeeze the bag the jelly will not be clear. Measure the juice, then return to the pan. (Make sure the pan is only half full: if you have more juice than that, do a second boiling.) Add in 500g sugar for every 500ml juice.
Heat the pan gently, stirring until all the sugar is dissolved. Then bring to the boil, skimming off any white scum that forms on the top. Turn the heat down, and leave to simmer uncovered until setting point (105ºC, 221ºF) is reached, usually about 10 to 15 minutes. I use a thermometer or you can try the wrinkle test: place a teaspoon of jelly on a cold saucer (keep in the fridge), leave to cool for a minute, then drag your finger over – if the top wrinkles, it’s ready. (Always take the pan off the stove while doing this to avoid overcooking, which loses the set.)
Pot into warmed sterilised jars and immediately place a wax circle on top (wax side down), and seal. Store in a cool place. Tie a pretty ribbon round and label. 19th Sep 2008
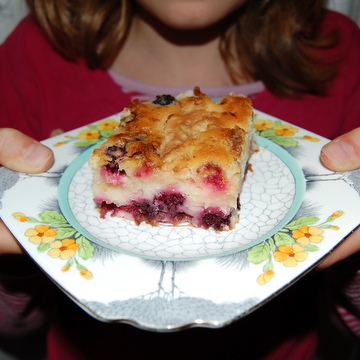
This is delicious hot, but even better cold a day or two later.
4 cooking apples (about 800g) Juice of a lemon 285ml whipping cream 175g butter 225g caster sugar 3 eggs 300g plain flour 300g blackberries 1 tbsp dark brown sugar for sprinkling Heat the oven to 200 degrees C, Gas Mark 6. Grease a 30cm by 20cm roasting tin with a little butter, then dust lightly with flour. Peel and core the apples, then slice them into rings. Toss them in the lemon juice to stop them browning. Put to one side. Put the cream and butter in a pan and bring to the boil, then set aside to cool slightly. Meanwhile, whisk the caster sugar with the eggs until they turn pale. Whip the cream mixture into the egg mixture, then fold in the flour until completely smooth. Pour a thin layer of the mixture into the tin. Then lay the apple rings over, and sprinkle the blackberries on top. Pour the rest of the mixture over the fruit – it will only just cover it. Sprinkle the dark brown sugar evenly over the top. Bake for 45 mins to an hour (depending on your oven) until golden. Leave to cool in the tin then cut into squares. Also try our Blackberry Polenta Cake.
4th Sep 2008
Tamsin: We're always being told to let children help with the cooking, but I have never found this an easy thing to do. This is certainly a failing as a mother and has something to do with being a control freak when it comes to my (and I see it as ‘my’, not the family's) kitchen. It also has to do with the amount of mess that can be produced by children (and some adults) whenever you let them near the mixing bowl. But I know the advice is right, so I take deep breaths and let people into my domain, not least since cooking is such a passion of mine that I want to pass it on to my children.
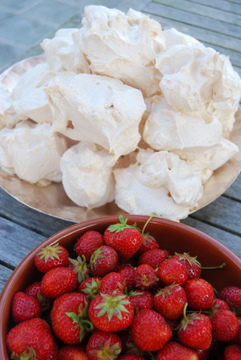
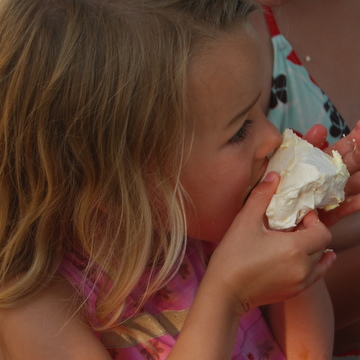
This summer we had my nieces aged four and six to stay and we all made fluffy meringues together, which was great fun and a really good activity to do with younger children. I first set them up on the floor of the kitchen as the work surfaces are too tall and we don’t have enough stools. They cracked the eggs and I divided them. Then we took turns whisking them with the electric whisk, making sure that the whites were fluffy and firm before we began to add the sugar. The ratio of sugar to egg whites is 50g caster sugar to every 1 egg white. Now, this next part cannot be hurried. Add 1 to 2 tablespoons of sugar to the egg whites and beat well before adding another 1 to 2 tablespoons sugar – carry on in this manner until all the sugar is all incorporated. This method of adding the ingredients worked well with the younger ones as there was plenty of opportunity for turn-taking, whether whisking or adding. By the end you should have a glossy, thick white mass which can easily be scooped out using two spoons, and placed on a tray with baking parchment on it, into two meringue blobs. (There is no correct shape for a meringue blob and they do not need to be too regular, so let the children make them as they like.) Place in a cool oven (150 degrees C/Gas Mark 2) for however long it takes for them to dry out. Check after 30 mins that they are not browning too much, if they are, turn down the oven a bit. Over all they should be ready after an hour but you can keep them in there for another hour if you want.
Eat with plenty of soft fruit and cream.
23rd Aug 2008
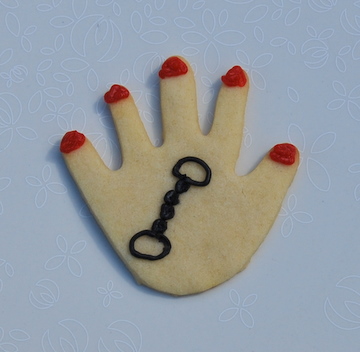
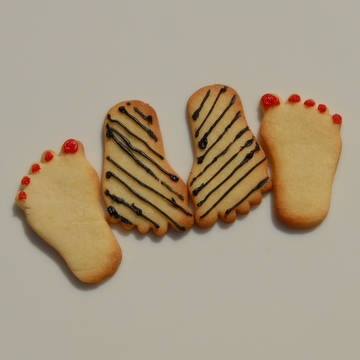
Tamsin: Last year we made Biscuit Feet (see blog 6th August 2007). This year I decided to do Biscuit Hands using the hand-shaped cookie cutters I've had at the back of my drawer and never used. I made the same shortbread dough as for the feet, since it keeps its shape so well. When the biscuits were cooked we decorated them by thinking of all the words or phrases that had a prefix of ‘hand’.
Handcuffs...
Handbook...
Handyman...
Handball...
Handbag...
More handbags...
Handrail...
Handwriting...
Handful...
Carla just did these so she could put some pretty rings on. 14th Aug 2008
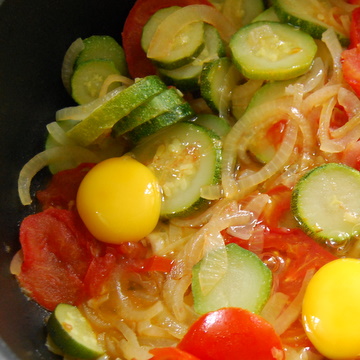
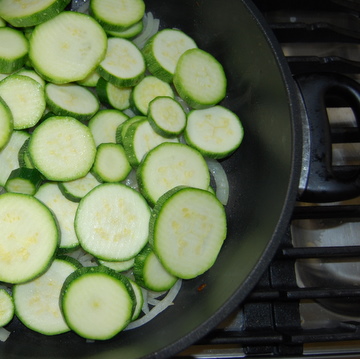
Tamsin: This has no other name, so if my son asks me, ‘What's for lunch?’ and I reply ‘The Courgette Dish’, he knows exactly what it is.
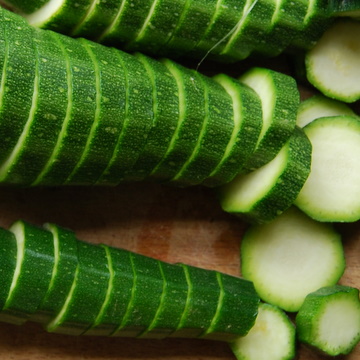
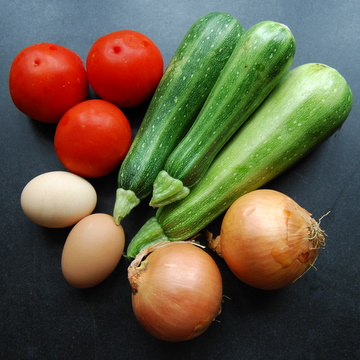
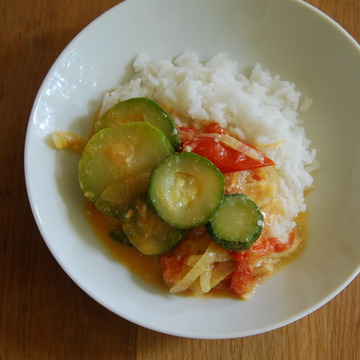
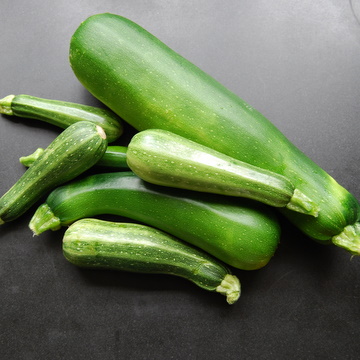
At this time of year courgettes are at their best and serving them just as a side vegetable does not seem to give them enough respect. The quantities of ingredients for this dish do not really matter, it depends on how many courgettes, onions, tomatoes and eggs you have in the fridge, but I will give a rough guide to help those brave enough to try it, below. The one thing that cannot be messed about with though, is that it has to be served with rice and mango chutney.
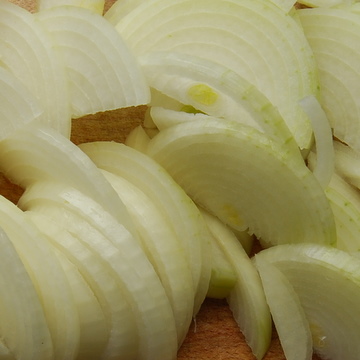
Take 2 medium onions, 3 to 4 largish courgettes, 3 large tomatoes and 2 eggs.
Thinly slice the onion and put in a large frying pan together with a couple of tablespoons of olive oil. Fry gently for about 10 mins until the onion begins to soften.
Slice the courgette and place over the soft onion. Turn the heat right down and put a lid on the pan so the ingredients begin to steam fry. Every so often, lift off the lid and turn the ingredients over so that they all get a chance to fry on the bottom of the pan.
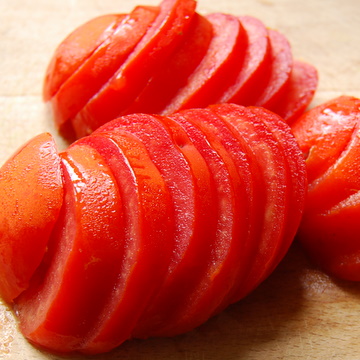
Once the courgettes are cooked, but still with some crunch to them (this will probably take about 15 minutes), add the sliced tomatoes, cover and cook for a further 10 minutes, turning the ingredients as before.
Take the pan off the heat and break in the two eggs. Briefly mix through so that the egg begins to cook and forms a sauce with the cooking liquid. Transfer to table (preferably outdoors) and eat at a leisurely pace.
My other tip for cooking courgettes is to grate them, place in a sieve and wring out some of the liquid by squeezing the courgettes in your hands. Fry in olive oil, adding salt and pepper to taste, and serve as a side vegetable.
If any of you have any other great recipes for using courgettes I would love to hear of them, as my plants keep producing more and more and the kids' enthusiasm for them does begin to wane. 17th Jul 2008
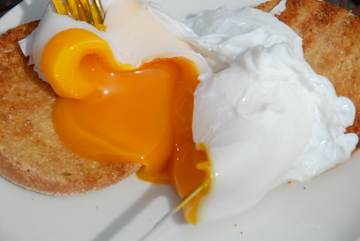
Jane: Our exceedingly kind neighbour Julia brought round a big bag of home-grown gooseberries this week, freshly picked from her allotment. I love goosegogs though they are funny-looking things, all veiny and hairy and hard as bullets, full of juice and tart flavour once you cook them. Some were very large and it suddenly brought back memories of reading years ago about some wacky ‘gooseberry clubs’ around Manchester and Yorkshire where growers had annual competitions to cultivate the largest gooseberry ever. They stripped their bushes of all fruit but one, which then grew to a whopping two ounces or more. Just eight of those and you can make a pretty decent gooseberry tart. But instead, we decided to make our favourite green pud - gooseberry fool.
Many recipes use whipped double cream, but I prefer the poor man’s fool where you mix custard and cream together so it’s not quite as rich. You can make your own custard, though I use Bird’s which is a lot quicker and is another childhood food favourite that I still absolutely adore. (Especially when it’s as thick and gungy as wallpaper paste, but that’s another story.) I also add a splash of elderflower cordial, to give the gooseberries a nice depth of flavour. Surprisingly, the children lapped up this pud, and wanted more. And meanwhile, I'm thinking what a good idea a meaty gooseberry and elderflower jam would be. I'll keep you posted... PS: Guess what: many of the old Yorkshire goosegog conventions are still going strong. The Egton Bridge Old Gooseberry Society, which has been running for over 200 years, is apparently having its annual competition to find the heaviest gooseberry on the 5th August. Unmissable. See you there! 27th Jun 2008
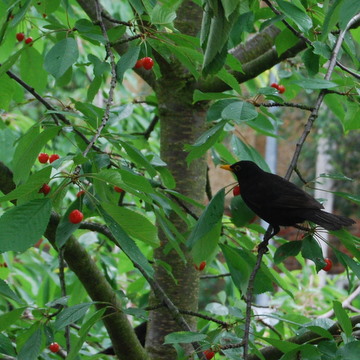
Every hour counts and I am on constant watch. Why this level of alert? All so that I can get to my cherries before the birds do. If the weather is sunny the situation can change rapidly – one day a tree full of green fruit, the next a tree full of cherries and the next a tree stripped of anything red. For many years I've not been successful with this vigil, but this year I was determined to succeed.
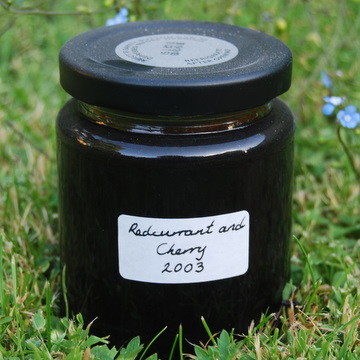
In fact, I know the exact year I last managed to get the timing right – 2003 – because I have one last jar of ‘Redcurrant and Cherry Jelly’ sitting in my cupboard. I can’t bring myself to break open it until I've replenished the stock of that delicious flavoured jelly.
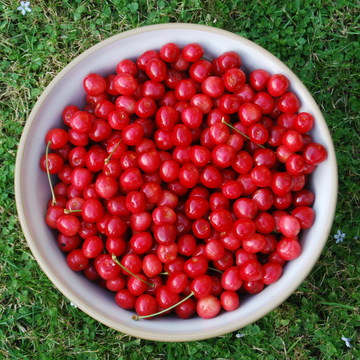
The watch came to an end last week. By Thursday evening the cherries had turned shiny red and I gave the go ahead for ‘action cherry picking’ to begin. Joe, who was on standby, began by shinnying up the tree while I looked for the large step ladder. In the end I gave up (how can a five foot ladder get lost?) and went for the ‘stand on a stool with a walking stick to hook the branches down’ technique. It worked and we were rewarded with a large mixing bowl of red cherries, with enough left on the tree to feed the hordes of hungry blackbirds and wood pigeons. We got to the cherries just in time, 24 hours later the tree had been stripped.
Jelly is the best thing to make with a fruit that has so many stones in it. This year I decided to make pure cherry jelly without the redcurrants. As soon as the family saw the jam pan coming out, they put the bread maker machine on so we could have fresh warm white bread, dripping with melted butter and spread with the scrapings from the jam-making pan. There is nothing better for a summer’s late evening snack.
6th Jun 2008
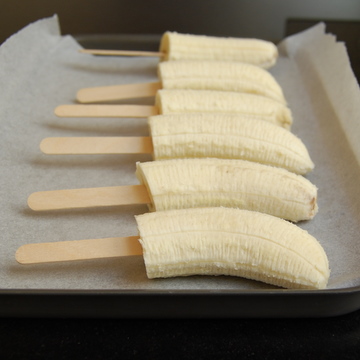
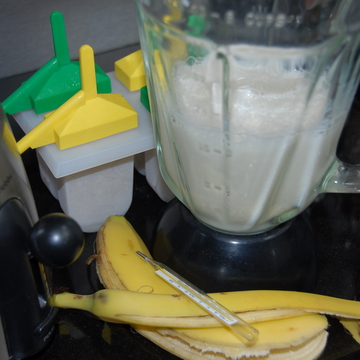
Tamsin: For me to say these are delicious means little since my usual diet contains one if not two bananas a day. But when my son Joe said they were fantastic it really gave them the seal of approval because he hates bananas. I've never understood why. He is not a fussy eater, but ever since he was old enough to have a choice in the matter he's avoided bananas. Maybe he had banana overload in the womb. Perhaps that's why when he was born (which was not quite the straightforward birth I'd hoped for), the midwife couldn’t believe how unstressed he was. It was thanks to the potassium, high quantities of which are found in bananas, which is good for stress, heart and blood pressure.
Frozen bananas do have a unique texture – very much like eating ice-cream but a lot less messy – unless you allow the children to smother them in chocolate. This can be done at the last minute and they can choose how much they would like.
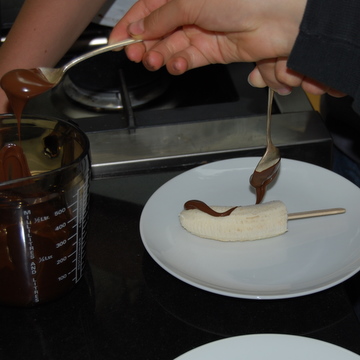
There isn’t really a recipe but here’s how. Cut in half as many not overly ripe bananas as you need and put them on a tray lined with greaseproof paper. Push a lolly stick halfway into each one. Place them in the freezer for at least an hour. Melt some chocolate (I use dark, but not 70 per cent as you want a bit of sweetness) in a small container in the microwave or on top of a double boiler.
When ready, drizzle spoonfuls of the melted chocolate on top of the bananas and consume. If you are going on a picnic, cover the whole of the banana in chocolate and insulate well. They are just as delicious when left to soften up a little.
17th May 2008
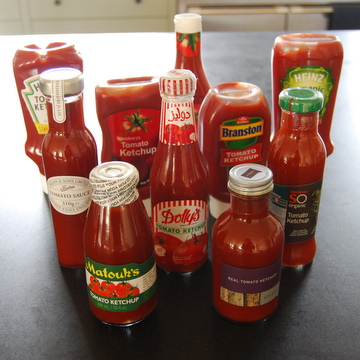
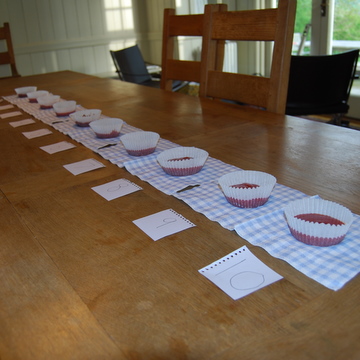
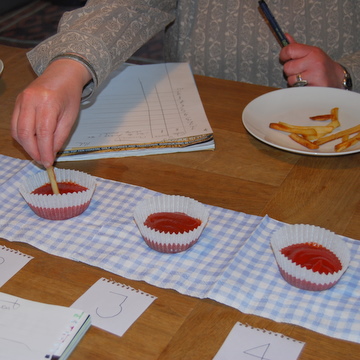
Tamsin: I have always been keen on tomato ketchup. In more youthful times I was partial to a ketchup sandwich, best made with white bread, thickly spread with butter and finished off with the layer of ketchup. So when my friend Helen suggested we did a ketchup tasting test, I was all for it. We decided what was needed was as many different bottles of the red sauce as we could find, together with a big bowl of chips and chipolatas to dip in.
Unlike the hot chocolate tasting we did recently (see blog 13th January 2008), we decided this should be a blind taste test. As a lifelong lover of Heinz, I had no doubt that – blind or not – I would be able to identify my favourite sauce and would have placed a bet on it if someone had challenged me.
We labelled the bottles 1 to 10 and then squirted some ketchup from each bottle into a muffin case and laid them out in the middle of the table.
Chips in hand and score sheets at the ready, we began to dip, chew and scribble. Early on it became apparent to me that picking out my beloved Heinz was not going to be as easy as I'd thought. Some sauces were definitely not contenders being too acidic or sweet and therefore a bit unpleasant while others were richly spicy and (although not Heinz) definitely hit the spot. Even so there was enough uncertainty amongst the rest that I began to be glad no bet had been placed.
Top came a ketchup that had been bought in the Caribbean - Matouk's - sweet and intensely spicy. Second was a brand called Dolly's, third, much to our surprise, was Branston, with Heinz coming in fourth. Sainsbury’s low-salt and sugar took tenth or last place. The results were a bit of a shame since we only have one bottle of the Caribbean winner. Alternatively, that could be seen as an excuse to book a holiday in the sun sooner rather than later.
5th May 2008
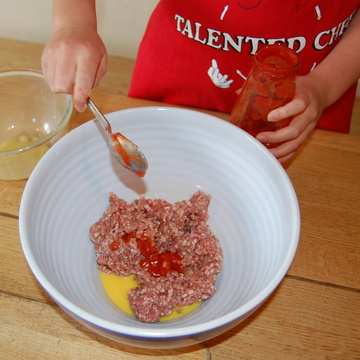
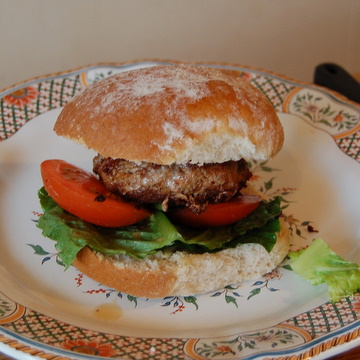
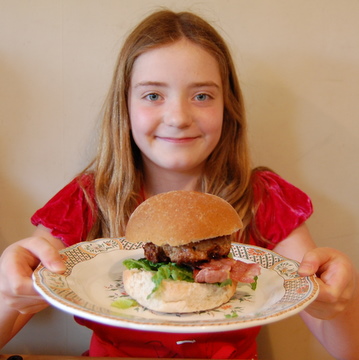
Jane: At school last week, Maudie learnt how to make burgers and was keen to cook them for us in a special Saturday night dinner before our weekly date watching the Nancies twirl and sing in 'I'd Do Anything' (we're all hoping that Jodie or Niamh will win). Maudie took our orders: we had a choice of burgers with bacon and cheese, lettuce and tomatoes, and she thought we'd also have corn on the cob on the side. She kept saying how easy it was – all you need is some mince (we used lamb mince), an egg and a squirt of tomato sauce.
First she got a big bowl and put 500g of mince in it. Then she beat an egg and
poured it over, and added two tablespoons of tomato ketchup. (This is a good
time to add salt and pepper if you like.)
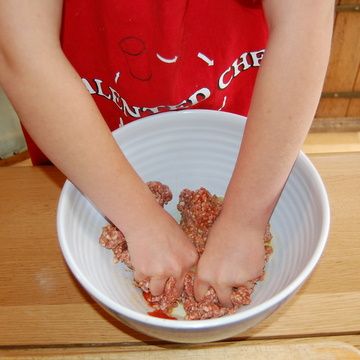
She squished the whole lot
together with her fingers…
…and got
lovely and messy.
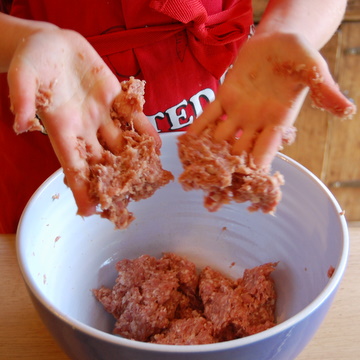
Then with
a bit of flour on a board, she rolled them with her fingers into four burger-shaped
patties.
She
heated some vegetable oil in pan, and fried them for about 8 minutes on either
side until they were cooked – the fat splashes a bit, so adults might want to keep an eye on this bit. Meanwhile the rest of dinner was got underway. The bacon went under the grill; the lettuce and tomato were washed and chopped; the corn cobs put on to boil; the buns were cut in half. Timing is everything and this was coming to a culinary crescendo at just the right moment!
Two of us
wanted melted cheese, so Maudie placed our burgers on half a bun, slapped the
cheese on top and put them under the grill. Then she made up the other burgers,
one with bacon, put them on plates, and dished them up with the corn in a
separate bowl.
We all
sat down with sighs of delight to a meal that was delicious, especially with a
big squeeze of ketchup in the middle of the bun. This was the first-ever dinner
that Maudie has made us, and she enjoyed it so much she’s keen to do the whole
thing again next week. And so are we! 22nd Apr 2008
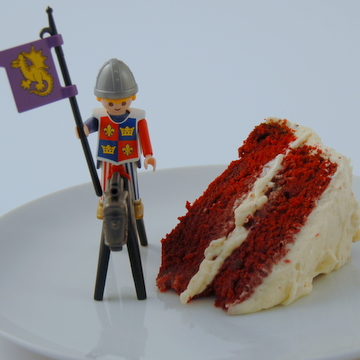
Jane: It’s St George’s Day today and duh! I only realised when I heard it mentioned on the radio this morning. In England, we’ve always been a bit low-key about celebrating our patron saint’s day compared to Wales (St David’s day, 1st March), Scotland (St Andrew’s day, 30th November) and Ireland (St Patrick’s day, 17th March, when even the rivers turn green…). But this year things are different – the red and white flag is flying over 10 Downing Street and the whole nation seems to be celebrating. So I thought I’d dash off a quick red and white cake in honour of St George and his Dragon.
I remembered the red, white and blue confections they make in the US for Independence Day and thought that a red buttermilk sponge with a thick white creamy icing would be just the thing. The icing for this cake is unusual – you make a milk and flour roux and add it to the buttercream – but it tastes, as Tamsin said, ‘yummily synthetic’. On top, decorate it with a red criss cross for St George’s flag, or a toy knight and dragon!
PS: St George isn’t really terribly English – he was probably a Roman soldier who was martyred in Palestine in the 4th century for his Christian beliefs – and during the middle ages his story became linked with a legend about a soldier who slayed a ‘dragon’ in Libya. Still, he's ours... 12th Apr 2008
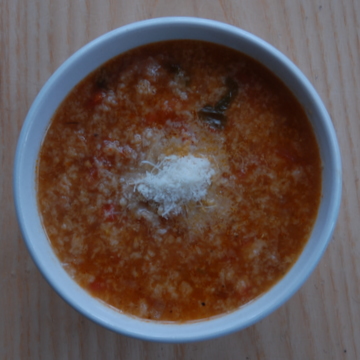
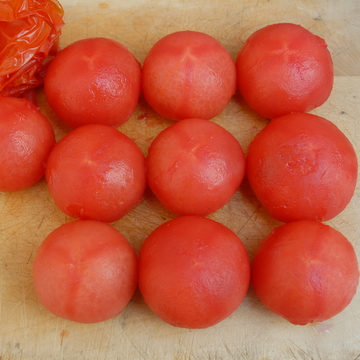
Tamsin: Jane donated one of her jars of chicken stock to me on Friday which gave me the chance to try out a recipe which calls for nothing but the finest ingredients. Pappa Al Pomodoro is one of those simple Italian dishes which puts you back in touch with the ingredients that you are transforming. It begins with the fresh tomatoes which need to be peeled. My heart always sinks when I read a recipe with this requirement in it but, once I get down to actually peeling them, I realise how easy it is and what a pleasure it can be.
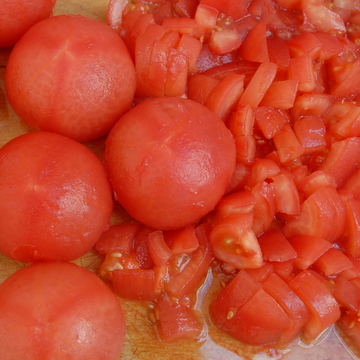
The skins slip off between your fingers so easily and you are left with beautiful pink/red velvety spheres, which are so much more alluring than when coated.
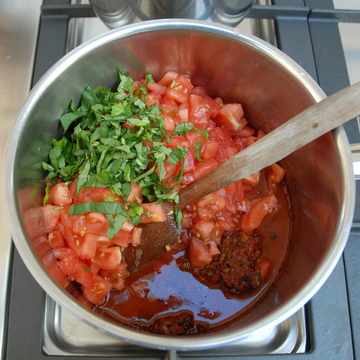
Once chopped they are added to the leek mix together with the basil leaves which should be torn to pieces to perfume your fingers and release that smell of summer.
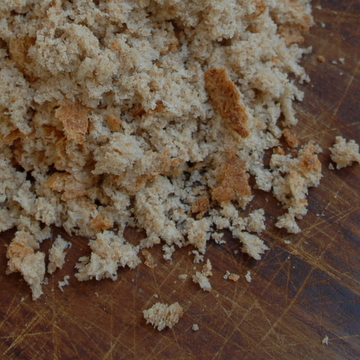
Finally, the breadcrumbs are mixed in. It is worth spending time crumbling it between your fingers to achieve fairly coarse breadcrumbs and finish off the sensory cooking experience.
The resulting dish is a thick soup which has a comforting texture and is a meal in itself. Serve for lunch or light supper with plenty of fresh Parmesan.
Postnote. One final note of caution. Do set the timer. It takes an hour to cook, which is plenty of time to go off and do something else. Sadly, I have reached the age when ‘out of sight out of mind’ is reality - with this result. Luckily, not all was lost and the vast majority of the saucepan's contents were saved, making the preparation time well worth it.
10th Apr 2008
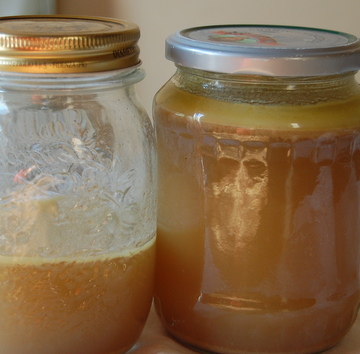
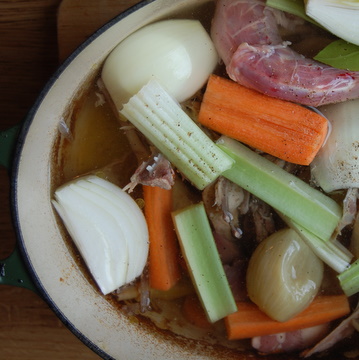
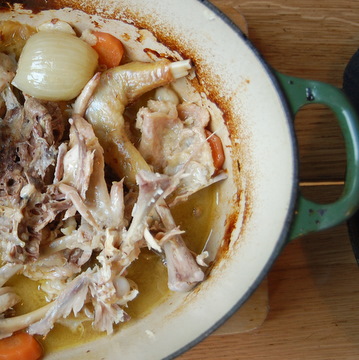
Mal: I discovered the wonderful powers of chicken stock in the early 1980s when doing some work at the house of the mother of a good friend. Gorgeous Dolly Frankel, as anyone will tell you, always has food cooking or cooling in her kitchen – delicious gefilte fishballs, sumptuous roast chicken and, if you're really lucky, a chicken soup with kneidels. Because she's warm, welcoming and ever-generous, Dolly will feed anyone who enters her home. If they're not hungry when they arrive, they leave with food parcels.
I vividly recall the smell of the soup welcoming me the first time I walked through her kitchen door (I never saw anyone use the front door in Dolly’s house). When suffering a bad cold one week a few months after working at her house, Dolly had some soup and stock delivered to me with instructions to take both, and get well. It worked. She gave Jane some extra-strong, recuperative stock-cum-broth after Maudie's birth which completely did the trick.
She taught me that you don’t need to waste a single bit of a roast chicken, that it is all good (and her daughter, Jennifer, taught me where the chicken ‘oyster’ is to be found). So I started making stock with my roast chicken carcasses every week or so. The following ‘recipe’ I fudged partly from Dolly, and partly from experience of making stock. (And yes, the smell pervades the house, but it’s such a fabulous smell.)
Jane: the deliciousness of the aroma of boiling bones that filters through the house is matter of taste (I count my blessings it's not fish bones bubbling - that only happens about once a year). Still, I love Mal's stock which we always have stacked in the freezer. I use it on a thrice-weekly basis for soups, risottos, in spag bog or simply mixed with honey to baste oven-cooked chicken thighs. It's such a flavour intensifier - everything just tastes better. 6th Apr 2008
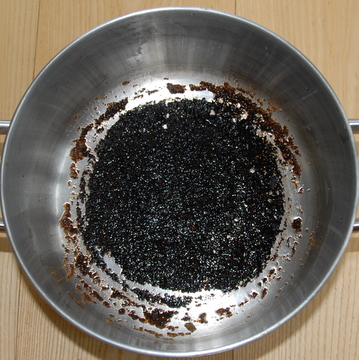
Tamsin: Salt has always been used as a protection against witches and was one of the substances that were placed in ‘witch bottles’. These were long, thin bottles that once filled, offered protection against evil spirits. They were then buried in the garden or placed near windows and chimneys, the weak points of the home where witches could easily slip through. Salt was one of many items that could be placed in the bottles to give protection, including iron nails, thorns, threads, hair and urine.
For me, I always use salt to protect the family from eye infections. The minute anyone complains of a tingly sensation in the eye or the first signs of conjunctivitis appear, I boil a kettle, make up a saline solution, leave it to cool and then repeatedly bathe the eye with it. This is how I came to leave a glass full of salt water and then forget about it in our bathroom for several days.
By the time I did notice it the glass was beginning to be covered in tiny salt crystals. Excited by my unexpected science experiment, I decided to leave it to see what would happen. As the days progressed so did my crystal glass until after two weeks it was completely covered. Was this due to the humid environment of the bathroom? Could the same thing happen elsewhere in the house? How much salt had I added to the water? The questioning scientist in me began to take hold, although I have yet to find out any of the answers. So the next time someone’s eye starts to tingle, don’t be too quick to clean up afterwards – start your own crystal experiment instead.
21st Mar 2008
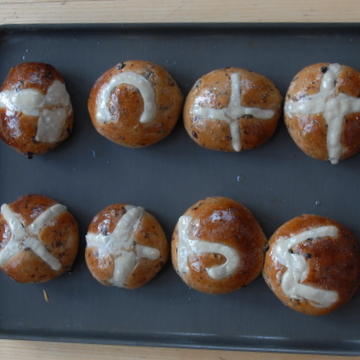
I thought our Hot Cross Breakfast Buns this morning were not going to be a success - I ran out of time and didn't have the right flour - but all turned out okay in the end. So here are the tips I found worked.
Firstly, I made them in the bread machine but instead of doing them on Raisin Mode I used the Pizza setting which only takes 45 minutes instead of 2 hours 20 mins.
Secondly, I didn't have any Strong Plain White Flour. I could have used Strong Wholemeal but I know the kids would want the fluffy texture of white buns. So I used normal plain flour and although they hadn't risen much before I put them in the oven, they puffed up nicely during baking. On eating you couldn't tell any difference.
So if you have a little time, have a go – it will all work out all right and home-made hot hot cross buns make Good Friday.
6th Mar 2008
Tamsin: I have always loved Marmite, especially on toast, late at night or as a snack when coming in from the cold. It is hard to beat, but there is one thing that does beat it and that is a Marmite roll. It is something in the way that they are crispy on the outside and soft in the middle, with the flavour tightly caught in the spirals and the satisfaction of biting into a tube!
As an after-school snack or warming Sunday afternoon tea they always hit the spot. My children can eat platefuls of them and still ask for more. It is important that the bread is a thin white sliced loaf so that they roll up easily and the texture is fluffy and soft in the middle.
Start by cutting off the crusts from a piece of bread and spreading butter on both sides of the slice. Put on as much Marmite as your taste buds like and roll tightly up. Place under the grill until toasted, turning to ensure all sides are browned.
I introduced the idea to my friend Anna-Louise and she modified the recipe a bit by mixing the Marmite and butter together in a bowl and then spreading this on the bread. This method gave a very intense Marmite taste and was equally satisfying.
But be warned, you may find that once your family have discovered the delights of these rolls, one loaf of bread will not be enough! 29th Feb 2008
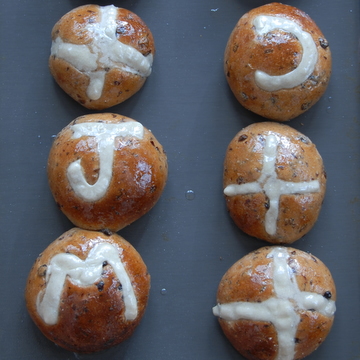
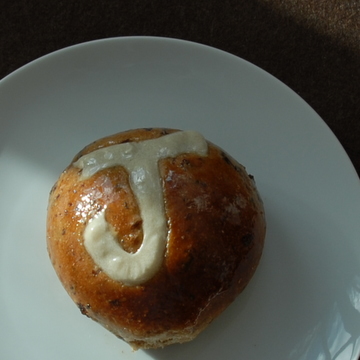
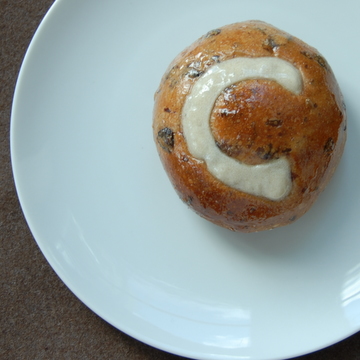
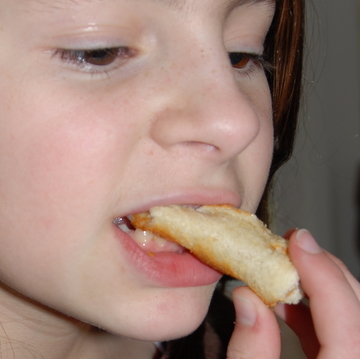
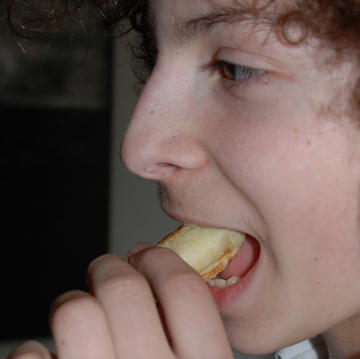
Tamsin: Carla and I have been engrossed, over the past few weeks, in the Masterchef programme on BBC 2. It came to an exciting conclusion yesterday that saw the technically brilliant James triumph over the amazingly creative Emily. It inspired Carla to try her hand at Masterchef cooking. This means that the food not only has to taste good but it also has to be very well presented.
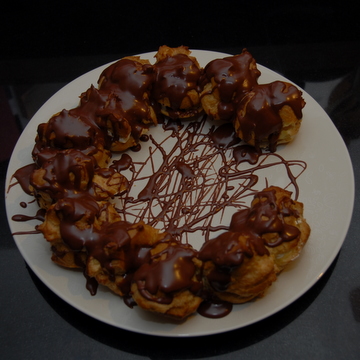
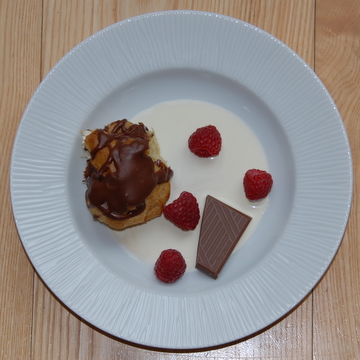
She began last night by making a choux ring filled with cream and covered in orange chocolate sauce. It looked beautiful on the serving plate, arranged as a 'C' for Carla. She then plated up our own individual nouvelle cuisine portion.
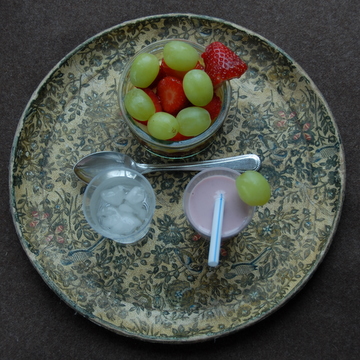
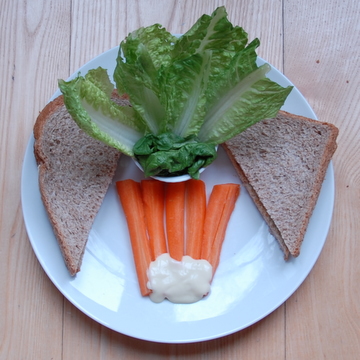
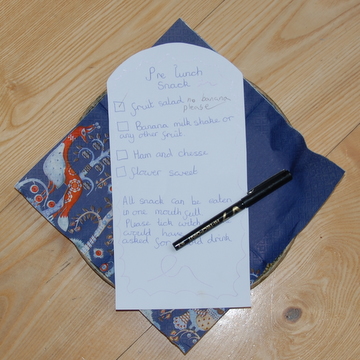
Today, as she is still off school, she took over breakfast, pre lunch snack ...
...and lunch.
She wrote a menu, orders were taken and the food delivered that was a feast for the eyes as well as the stomach. What nicer mother’s day present could any mum have than to have a day free from cooking? I hope that the enthusiasm for meal preparation lasts until Sunday.
Helping Carla make the pudding reminded me how good choux pastry is for children to make. It does require a saucepan and heat but is very easy. Spoonfuls of the resulting dough is dropped on greased baking sheets and cooked, when they puff up into light, golden brown containers which just call out to be filled with cream and covered in chocolate. A naughty treat but add some fruit and you can justify it. 5th Feb 2008
Nicky: In our house pancake-making is a two person job. I make the batter and find that for four hungry people you need to treble the recipe using 3 eggs. Some people say that the batter needs to stand for a while before you use it - I don't think this makes any difference. I just put it all in a food processor and whizz. I then put it into a jug and handover to my husband. Cooking pancakes seems to have enough drama (and instant positive feedback) to interest men - a bit like barbecue cooking. He pours a tiny amount of oil into a frying pan, heats it up really hot and then tips any surplus back out and pours some batter in, turning the pan to make sure the batter covers the base. Then after a short while he flips it over and cooks the other side. He then repeats this process until the batter runs out.
I provide toppings - wedges of as many citrus fruits as I can find - lemon, orange, Satsuma, lime etc or maple syrup are the favourites for us but jam and chocolate are good too. If some of your pancake eaters cannot be at home at the right time, you can make the pancakes in advance for them to eat later. Make the pancakes in the normal way and then store them in a great stack with a sheet or greaseproof paper in between each one. When ready, put a pancake (without its greaseproof paper) on a dinner plate and heat in a microwave for about 20 seconds or to taste. Remember it is a well known fact that your first pancake will always turn out badly - they never fail to get better after that. Even the first one tastes good - it is just a mess to look at. At that point your pancake eaters will not mind at all - they will just be grateful you are making them. If you want to fill your day with pancakes then try these two alternative recipies Posh Polenta Pancakes or Awesome American Pancakes - they make great afterschool snacks. But of course you can never beat the original recipe for its tossability.
3rd Feb 2008
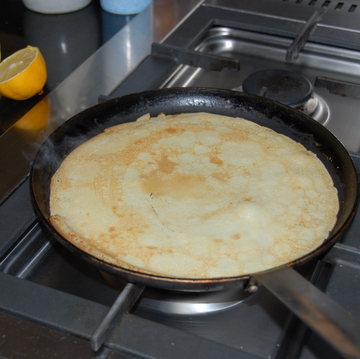
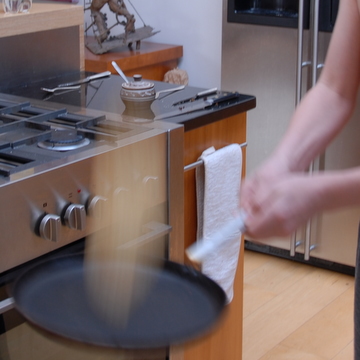
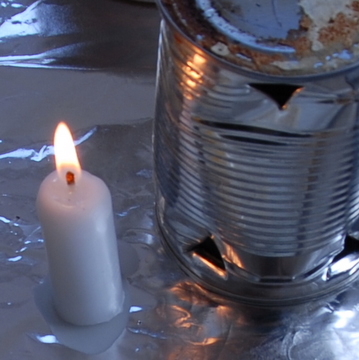
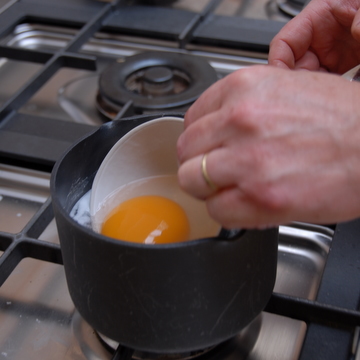
Tamsin: The talk at breakfast turned to pancakes (since Pancake Day is on Tuesday 5th February) and Joe recalled the best time he ever had making them. His scout leader had asked them to bring in a tin can which turned out to be their frying pan, with the heat to be supplied by a tea light. We decided that as it was a Saturday, with not a lot to do, we would try to replicate this experience in our own kitchen.
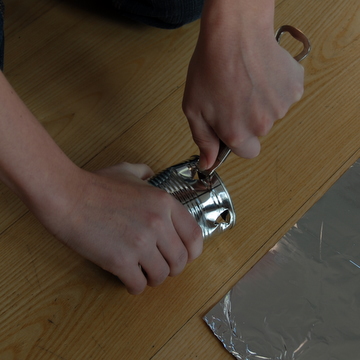
With recycling flowing over in our house, finding an empty can was not hard. We put tin foil on the floor and hunted out the candle. Using the pancake recipe we got underway. Joe was a bit fuzzy on the details, but I decided we had to punch holes around the can to allow oxygen in. This I did with a beer can opener, making a row of holes along the top and bottom.
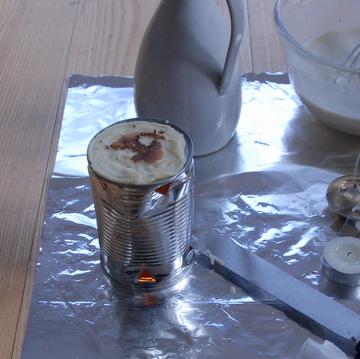
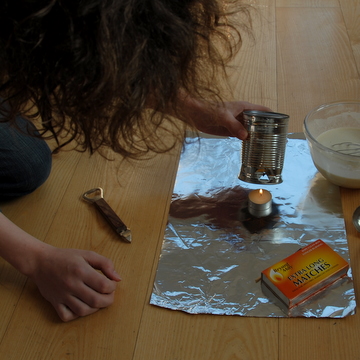
We then lit the candle, placed the can over it, oiled the top, poured a spoonful of batter on and waited, palette knife at the ready to toss it. We waited and waited 10 mins (we realised the candle had actually gone out), 20 mins (Joe suggested we should have let the tin get hot before pouring in the batter), 30 mins (I suggested that maybe we shouldn’t have used a baked bean tin, but a smaller one), 35 mins (I decided we needed more oomph).
More oomph meant a kitchen candle cut down to about 6cm. We installed this underneath, securing it with a bit of melted wax, and began again. This time things progressed more rapidly. The palette knife was soon pressed into action and the pancake successfully flipped. We had to move the tin around a bit so the candle flame was not always in the middle, but this was easy enough as the bottom of the tin was never hot.
29th Jan 2008
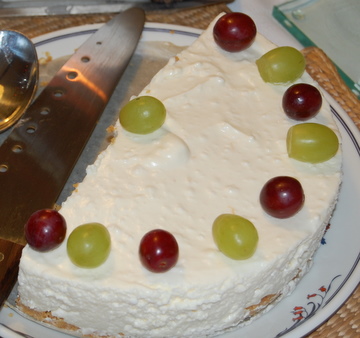
Jane: Food for me is inextricably bound up with childhood memories and emotions, which is why I love prunes and custard, beans on toast, smooth oatcakes and will happily eat muesli for breakfast for the rest of my life. I was reminded of this a while back when we went for lunch at the home of snail porridge and bacon and egg ice-cream - the very posh Fat Duck in Bray. What struck me was not how sci-fi the food was (though it was), but how it delighted my nostalgic foodie yearnings. There were sherbert fountains in those old yellow packs, licorice, tiny cornets… and on the table, a questionnaire asking us to try and remember our favourite flavours from childhood. Mine, I remember writing, was tinned Del Monte peaches with evaporated milk, which we used to have for Saturday tea. My mum used to make us steamed puddings (it was Scotland and cold), rice puddings (still love ‘em) and shepherd’s pie on a weekly basis, but the treat I remember as the highlight of the year was a refrigerated cheesecake, rich but light and fluffy, a tricky combination to pull off. Strangely, we always had it in winter, not summer, which is perhaps why it seemed so exotic. I always had seconds and usually thirds, yet every mouthful was as delicious as the one before, and even while eating it I was aware of a desperation that this joy would soon end. I guess that at the age of 12, I felt exquisitely sophisticated to be eating such a bouffant, blonde girls’ pud.
Which made me wonder: what foods will transport our kids into that nostalgic bliss when they’re grown up? Will it be pizza and garlic bread (surely too dull), a giant teacake or creamy cranachan? Grandma’s just made us her Cool ‘n’ Fluffy Cheesecake (it went down very well) and I’m thinking how nice it would be, if it ended up being that. 17th Dec 2007
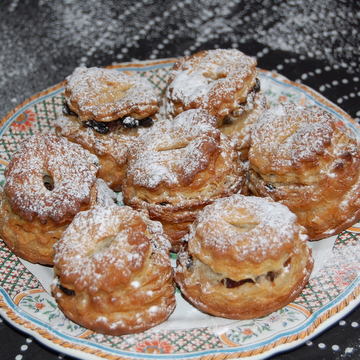
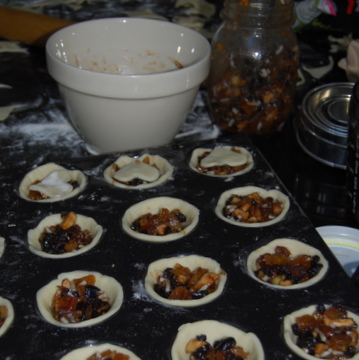
Jane: I’d always vaguely known that mincemeat used to contain meat – hence the name – but I’d never thought of making real meat mincemeat for Christmas until this year, when I was reading Paul Levy’s foodie history, The Feast of Christmas. He has a bit on mince pies and at the back quotes the 1604 mincemeat recipe of Lady Elinor Fettiplace, which sounds almost like a samosa or spicy pasty, containing the same amount of meat and suet as dried fruit, plus spices like nutmeg and mace, a bit of salt and almost no sugar at all – very different from today’s sweet mince pies.
All you need is a bit of lean mince, some dried fruit, suet and spices. The only unusual ingredient is rosewater, which you can buy in supermarkets. I used puff pastry (even though Lady Fettiplace would never have heard of it), because I love its buttery taste and tumble-down look.
As for the taste – the squeamish among you will be glad to know the meat was almost undetectable and although Paul Levy pegged these pies as being savoury and spicy, I found they had a sweet aftertaste that was much less cloying than the modern version. I thought they were fab – and a good talking point for your Christmas party. The kids didn’t even realise there was meat in them until I told them, and the shock means they’ll always remember what the word ‘mincemeat’ actually means. Ye Olde Mince Meat Pies This recipe uses Lady Fettiplace’s mincemeat, taken from a 1604 recipe, updated by Hilary Spurling and reproduced in Paul Levy’s The Feast of Christmas. I’ve cut the quantities but kept it spicy – this now makes 24 jolly decent mince pies. For the mincemeat 125g lean mince 125g shredded suet 125g currants 125g raisins 1 pinch ground ginger 1 pinch ground mace ½ tsp freshly grated nutmeg 1 tsp ground cinnamon ½ tsp salt 1 tsp sugar Rind of one small orange 3 tbsp rosewater 1 pkt frozen puff pastry (use organic Dorset Pastry if you can find it – it is easily the best), defrosted Heat the oven to 220 degrees C, Gas Mark 7. Brush two patty tins lightly with vegetable oil. Mix all the mincemeat ingredients together in a bowl with your hands, making sure the mince and suet are evenly mixed with the dried fruit. Roll out the pastry to about 3mm thick, then cut 24 rounds with a 7.5cm cutter and 24 tops with a 5.5cm cutter. Place the bases in the two patty tins, and put a heaped teaspoonful of mincemeat on each, pressing down lightly. Dampen the edges of the pastry with water, and place a top on each one, pressing the join lightly to seal. Cut a slit in the top of each pie with a knife. Place the mince pies in the oven and cook for about 18 to 20 mins, until golden brown. Cool on a wire rack and dust with icing sugar before serving. 15th Nov 2007
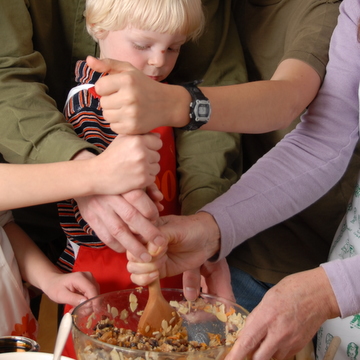
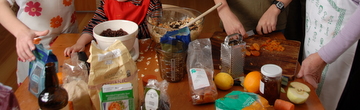
Tamsin: Stir-up Sunday happens only once every two years in our household, because the recipe we use makes enough for two puddings and we keep one for a year. It’s the recipe my mother always made and gives a very moist, dense pudding – just as I picture Christmas pudding would have been in the Dickensian era. We made our pud last year so all I have to do this year is get it down from the shelf and reheat it on the day. We had a house full of family on Stir-up Sunday last year so everyone gathered round the table and helped add in the long list of ingredients.
I’d made sure everything we needed was on the table (when the kids were younger I used to weigh out the ingredients beforehand so the pace of making was fast and they stayed interested). With three generations of family madly weighing, tipping, chopping and squeezing, the job was soon done and the serious business of stirring the pud and making our Christmas wishes began. Usually, we stir and wish one at a time but last year my nephew insisted we all did one gigantic stir together.
If I’m really honest, we actually make our pud on the Saturday before Stir-up Sunday, since the recipe calls for it to stand overnight and then steam or boil for 8 hours. This means a staying-in winter’s Sunday of games and general slobbiness with occasional visits to the cooker to top up the water. My mum possessed a pressure cooker which halved the time (find her Christmas pud recipe here), but I somehow like the exaggerated length of the making as a good antidote to everything that’s instant and quick today. And anyway, if you’re going to make something that tastes just as good a year later, it’s worth the effort. The advantage of a once-every-two-year pud is that you can concentrate on making your Christmas cake on Stir-up Sunday instead. Jane always makes a proper Christmas cake that is wrapped and matured in the weeks coming up to Christmas (this year the Caribbean Christmas cake). I favour a lighter cake made nearer the time and this year am plumping for an unusual yeasty Italian fruit cake.
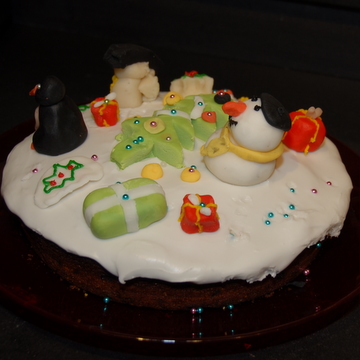
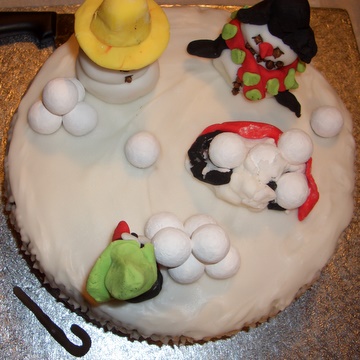
Whichever cake I go for it always – for my husband’s sake – has to have a layer of marzipan on it and – for the kids’ sake – a thick layer of royal icing. The decorating is also a family affair – or rather the younger generation of family. Ready-made icing, which acts like plasticine, has transformed the ease with which children can participate in the icing and decorating of a cake. It keeps them occupied for a while on Christmas Eve as snowmen, penguins and Santas are modelled and arranged…
This is one we did a couple of years ago when my nieces were very young - it is a gaggle of snowmen (or whatever the collective name is for a group of snowmen?).
13th Nov 2007
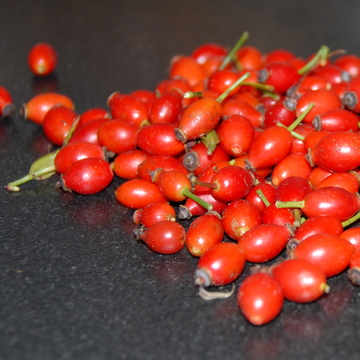
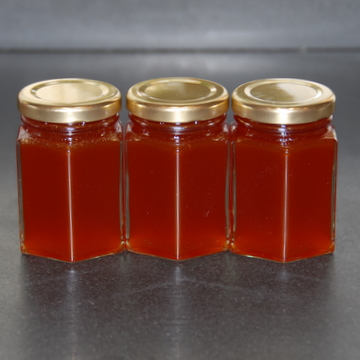
Jane: In the winters when I was little – four or five, says my mother, though that seems too young to recall a memory this vivid – my brother and I were given a daily spoonful of rosehip syrup. It came in a big bottle with a white plastic flip-up top, the scarlet syrup as sweet and luscious as anything I’d ever tasted. My mum says she bought it specially at the chemists for its high vitamin C content, to ward off winter colds and coughs. Other kids remember the grim slurp of cod liver oil, but we were lucky, we got red nectar instead.
They’re plentiful at this time of year and although you’re meant to wait until after the first frosts we collected them earlier, picking up a big bagful of gleaming red fruits in about half an hour flat. Boiling and straining them took a while (you'll find a recipe here), and the resulting syrup was a dull rosy colour rather than the bright vermilion I remember (early E numbers, I guess?). The taste – well, it’s different too, not as fruity, but with almost a lychee tang at the back of the throat as a gentle, pleasantly cloying aftertaste.
I was hoping the subtle rosehip flavour might work well in biscuits instead of golden syrup, but you wouldn’t know it was there in the coconut and rolled oats recipe I tried out. Better to pour it pure over pancakes, waffles, ice-cream, even rice pudding – it works well anywhere you’d reach for the maple syrup. As for me, I’m taking a Mary Poppins-sized spoonful a day while stocks last and enjoying the rosy rosehip memories. PS: Mentioning rosehips to a friend, Nigel said forget boring old syrup - as a kid he used to pick out the hairy seeds and drop them down the shirts of annoying classmates at school. Apparently rosehips seeds make the very best kind of itching powder. Which may or may not be good for some members of your family to know… 23rd Oct 2007
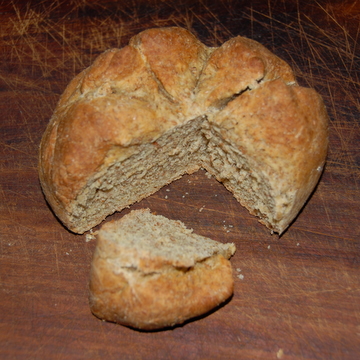
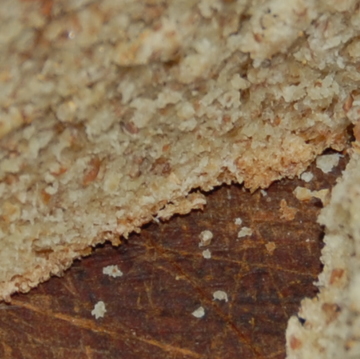
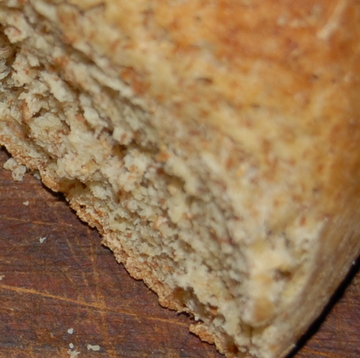
Carla: At my school we have a cooking club. It’s run by two brilliant cooks, Mandy and Melissa, who cook our lunches. They always make us try new food at lunchtime and at the cooking club. We make new dishes every week, sweet and savoury, then take them home and eat them for supper. They teach us how to present the food nicely and also how not to present it nicely – like when you’re making a sandwich not to press it down at the end. Sometimes they let us try the food that we’re going to use, like different eggs – duck, goose, quail and hen. They also tell us all about them. One week we made soup. When they make soup for our lunches they always bake soda bread to go with it. Because I don’t like soup that much, I eat the bread normally coz I love it. So when I heard that we were going to make soda bread in the club I was really happy!
It was easy to make, this is how you do it. I really hope you make some and enjoy eating it as much as I do. Tamsin: Our children are very lucky to have these two amazing dinner ladies. Mandy and Melissa started cooking the children's school meals two years ago. They both had children at the school and had kept the PTA going for several years, but wanted to do ‘something new’. This ‘something’ was to take over the school meals and create caring, inspiring and nutritious lunchtimes for the children. Mandy and Melissa are so closely involved they know most of the 400 children by name and if asked can wheel off the food each child has tried that week. Children are encouraged to try new foods, design menus, and help out with the serving (for which they get a golden ticket allowing them to jump the lunch queue for a day). Mandy and Melissa also do themed dishes (Tudor, Anglo-Saxon...) and celebratory meals throughout the year. When they took over, only 60 children had school lunches and now most of the 400 do. They've justly won awards but most importantly have transformed the way our children eat at lunchtimes. We can't thank them enough.
30th Sep 2007
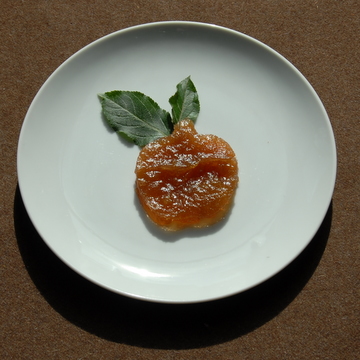
Jane: Pinch, punch, first of the month, and Hallowe’en suddenly seems very close indeed. I’ve been pondering what to give the trick and treaters – usually I buy multi mini-packs of chocolate bars to dole out, but this year I want something seasonal, home-made and a bit more wholesome. In one old book, I came across Apple Candy, simple and pure, just apples and sugar. You core and quarter the apples (leave the skins on), and simmer in water until they’re pulpy. Drain and puree them, then add as much sugar as there is apple puree. Simmer for an hour until it turns into thick jam. Then mix in a tablespoon of rosewater and put in a baking tray to cool.
So far so good, but then came the taste test. The kids didn't like the sludgy brown colour and when finally I got them to taste a morsel, the result was unanimous: ‘It’s okay,’ they said, munch, munching, ‘Actually it’s quite nice, but I don’t want any more.’ 24th Sep 2007
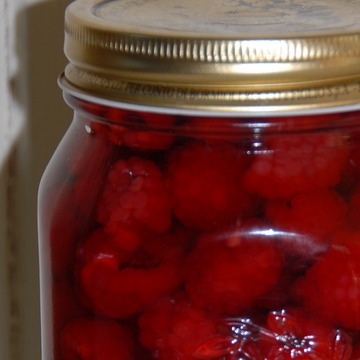
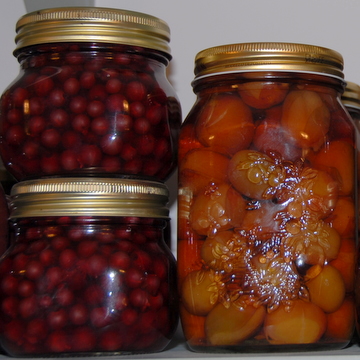
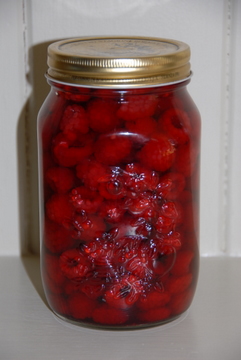
Tamsin: This weekend my mind began to turn to Christmas – early I know but there is one family tradition which needs to be thought about now. It’s the Christmas pud. I’ve never been keen on the traditional kind, probably because dried fruits are not my favourite (something to do with their texture). So instead my treat is a bowl of bottled raspberries – perhaps a unique Christmas dessert, though you never know? Bottled fruit can keep for many years – I have one elderly friend who has some bottled tomatoes her mother preserved during the Second World War. They are a glorious pinky red and look beautiful on her sideboard. Her mother was very proud of them, so never wanted to use them. She’d bottled them at a Women’s Voluntary Service workshop where she was taught to prepare for the harsh realities of rationing, not knowing such skills would become a necessity for many years to come. No picture of these, but here are some other fruit that I bottled 6 years ago.
As I make this year’s batch of bottled raspberries I’m looking forward to the day when I’ll twist the lid off, pop the seal with the side of a coin and tip the fruits into a bowl. I know this late summer day spent locking in their flavour will come flooding back through my thoughts (and tastebuds). For a fruit that usually gives instant gratification, I know this time will be worth the wait.
31st Aug 2007
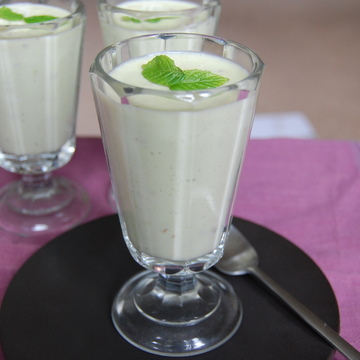
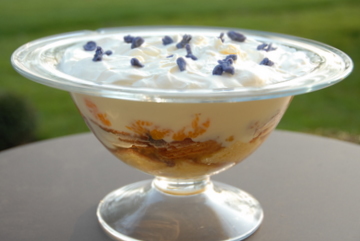
Tamsin: Trifle. I never thought it aptly named as it’s certainly not a trifle to make - at least until I discovered Alpro soya custard. Now I always keep a packet of this delicious stuff in my larder so I can whip up a wickedly pleasurable dessert for guests in two seconds flat. This trifle has that wow factor yet takes a few minutes to assemble. I always use a home-made sponge prepared in advance but a bought one will do just as well. To assemble the trifle: One 2-egg basic sponge cake 2 tins mandarin orange segments in their own juice Cut the sponge into pieces and place at the bottom of a large glass bowl. Sprinkle the mandarins over letting the juice soak into the sponge. Open the carton of custard and pour over. Whip the cream to a soft peak consistency and spread on top. I decorated with sugared violets but you can use hundreds and thousands for a more nostalgic effect.
19th Aug 2007
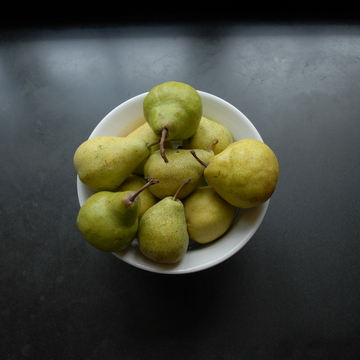
Last week I sat down to lunch and the sight of a big bowl of sliced pears greeted me. Hungrily I took one and was amazed to find this was not just any old pear – it had been covered in lemon juice, an idea that was completely new to me. Upon discovering this brilliant taste sensation I (along with the help of everyone else) quickly wolfed down the rest of the pears, then hurried to make more – until all the pears in the cupboard had gone. After this we made sure that we had an ample supply of pears and the dish appeared at almost every meal.
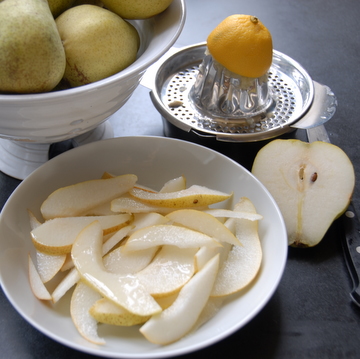
You’ll need:
3 to 4 sliced pears (unripe) Half a lemon Squeeze the lemon over the pears…simple! Another good thing about the lemon juice as well as being delicious is that it stops the pears from going all brown and yukky. Joe 5th Aug 2007
I made Anna-Louise's Redcurrant Tart yesterday so that I could photograph it and following her suggestion of using the left over shortbread dough for biscuits we cut them into feet shapes. Using 'Writing Icing' tubes we turned them into sandals, flip-flops, devils, angels, hippy, stripy and spotty feet. Mike then suggested that we photographed them in different positions, this proved to be great fun and we came up with ...
Kissing Feet (Mike)
Ballet Feet (Tamsin)
Hopping (Carla)
Hop Scotch (Joe)
Pigeon Toed (Carla)
3 Legged Race (Tamsin)
Walking (Carla)
Fallen Out ...
Back together (Joe)
You put your left foot in ...
Your left foot out ... (Joe) If you can think of any others I will make a fresh batch and add them to the list. If you want to have a go yourself then I would make 1/2 the quantity of the shortbread dough from Anna-Louise's Redcurrant Tart recipe. Tamsin 4th Aug 2007
This is a Roux brother’s recipe that was given to me by Anne Eatough – a friend from our days in Lampeter. It takes a while as the pastry needs some serious chilling and it is best made with homemade redcurrant jelly.
This tart is delicious though the pastry needs a cheery approach as it can disintegrate very easily. But if you roll it out quickly and put it into the tin quite swiftly, you can get most of it in before it gets too soft and floppy. Then just patch up the rest with the remaining bits. You can find the recipe here.
Anna-Louise 31st Jul 2007
Rummaging around in one of my favourite shops that sells ‘homestuff with history’, I came across a rather interesting kitchen gadget which I knew would come in useful this summer. And I was right. The runner beans are racing along as ever and it’s proving hard to keep up with them. I love them, as do the rest of the family, and the chore is made all the more fun by this device which cuts them as a great rate and also encourages the kids to help with the vegetable preparation. The shop is called Nest (www.homestuffwithhistory.co.uk) Tamsin 18th Jul 2007
It’s the last week of school and I still don’t know what to give my teachers. But then I think ‘Hey, why not just give them the same as last year?’ Apricot jam. Trust me, this stuff is amazing. It’s so simple to make and yet some of my teachers are still talking about it from 12 months ago!
If you’re not sure what to give them, this is it. Plus if there’s some left over this jam lasts for years (though not in our house). So who knows, maybe some lucky teacher will be getting a jar next year too…
Thank You Apricot Jam Makes approx. 14 8oz jars 2kg fresh apricots Wash the apricots. Cut them into quarters and remove the stones. Place in a preserving pan with the lemon juice and water. Gently bring to the boil, then reduce the heat and simmer for about 15 mins or until the apricots start to fall apart. Mash them a bit with a spoon. Add the sugar and stir gently over a low heat until the sugar has dissolved. Bring to the boil and boil rapidly until a set is obtained. (The time this takes can vary greatly, start testing after about 10 mins, but it may take much longer.) Stir regularly to stop it burning. Pour into sterile jars and place lids on while still warm. Joe 30th Jun 2007
I had another family coming for supper and very little time, as usual, to make something. I’ve been trying to empty my freezer, as I am very good at putting things in but not so good at taking them out again, so I delved in and pulled out a packet of puffed pastry. Of course I had to leave it to defrost, so in the end we all made the butterflies together. Quick and beautiful. We ate outside so they were our first summer butterflies in the garden this year. Pastry Butterflies Heat the over to 200 degrees C/Gas Mark 6. Sprinkle a third of the sugar on to your work surface and roll out the pastry to form a rectangle about 35 x 25cm. Sprinkle the rest of the sugar on top and press in with the rolling pin. Take the shorter end of the pastry and roll it up to the centre. Roll the other side to meet at the centre, moisten with a bit of water and press together to seal the roll. Cut into 1cm slices and place well apart on a baking tray lined with greased parchment, to prevent sticking. Bake for 10 to 12 mins. They should be brown and the sugar lightly caramelized. Cool before serving with soft fruit and a dollop of cream to secure the butterflies together. Tamsin 24th May 2007
It's elderflower season again, way earlier than last year. I know because we spent last summer half-term in the Loire valley where the elderflowers were already in bloom, a week or two ahead of Britain. We picked a load of them there, and made elderflower cordial in a kitchen where the ants followed the smell of sugar in a trail across the window ledge - then climbed up into the bowl and drowned, poor things, in the liquid. I had to handpick most of them out.
That was at my friend's house hidden deep in the French countryside. (Ants don't get many sugar rushes in that quiet environment.) On a whim, she'd bought preserving sugar instead of granulated and the resulting cordial was less liquid than floppy pectin-rich jelly, delicious on ice creams and as a sauce on puds - though perhaps not quite as successful diluted in drinks. 'Cordial' derives from 'cor' the Latin word for heart and I always think there's something heartwarming and old-fashioned about elderflower cordial. Now's the time to get out there picking: the flowers are just opening out, ripe and ready - in a couple of weeks they'll start browning at the edges, and brown elderflowers make everything taste of cat's pee. You'll need about 20 fresh heads, a lot of sugar and a little citric acid (from chemists). My elderflower cordial is distilling nicely in a big preserving pan in the kitchen, giving a lovely fresh sharp smell to proceedings. Tomorrow, I'll strain and bottle it into 'Geyer Freres, maison fondee in 1895' glass bottles with pressure tops. It's hard to find solid glass preserving bottles even in kitchen shops, but Lorina's Traditional Pink Lemonade comes in these lovely ones (which almost makes them free). In fact, elderflower cordial is just about food for free, so it's strange it costs a fortune whenever you buy a slender bottle in posh caffs and National Trust eateries. Much better to make your own, and in case you need a recipe, here it is:
Elderflower Cordial 1.8 kg sugar
Shake out the elderflowers to remove any bugs, then put in a big bowl or preserving pan. Slice the lemons and add to the pan. Pour the boiling sugar syrup over the elderflower mix, stir in the citric acid, cover with a clean cloth and leave for 24 hours at room temperature. Next day, strain the mixture through muslin into clean glass bottles. Drink, diluted with water to taste. Jane
17th May 2007
Early morning and Carla calls out to me from her bed. She usually sneaks down and sits with her back against the hall radiator waiting for everyone else to get up, so I knew something was wrong. It was a sore throat and temperature, and she was certainly not going to get out of her pyjamas that day. We hibernated at home, making the sofa into her day bed, listening to tapes, reading books and watching TV. Carla likes two things very much - chocolate and ice-cream - and being ill does have its advantages. Using Post-it notes she bombarded me with messages such as, 'Ice-cream would make me better' or 'Ice-cream would soothe my throat'. As a mum I was torn between wanting to give her something to cheer her up and feeding her something nutritious to help her get better. As a teenager when I went down with glandular fever, my dad gave me a sort of porridge of warm milk and bread. I remember this mixture with fondness but knew Carla would not have the same feelings. I also remembered the homemade ice-cream my mum used to serve, made from a custard base and mashed bananas. This made me think of just the right food to make for a sick daughter - banana milkshake - but this time I poured the shake into lolly moulds and put them in the freezer. Our banana milkshake could not be easier: one banana; about 250ml milk; blend, drink or pour and freeze. Carla's happy and I have overcome yet another motherhood dilemma. Tamsin
10th May 2007
Joe: Saturday and I'm going to a museum (in the middle of the fens) for my birthday with a friend. On the way back we stop at a stall outside someone's farm. As my friend is looking at the flowers, I wander over to another part of the stall full of good natural carrots covered in earth and sticks of asparagus piled high. Then, as I walk around the back, I spot a tray of enormous goose eggs next to the normal eggs. We buy some, and at home mum promises we can have them the next day. In the morning when I get up I think, what I can have for breakfast? Then I remember: the goose eggs.
Mike: Joe hands me the goose egg and says he wants it poached. Over the years I've perfected a poaching technique for hen's eggs, but these big goose ones are more of a challenge. Careful knife work is required just to break the shell and the thick membrane beneath it without breaching the yolk. That done, I carefully slipped the eggs from a saucer into a small pan of simmering water with a splash of vinegar added (no egg poacher is big enough for the job). After a few minutes and two slices of buttered toast later we had a real 'man'-sized breakfast.
|

|