|
30th Sep 2008
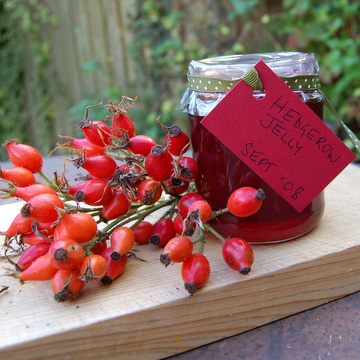
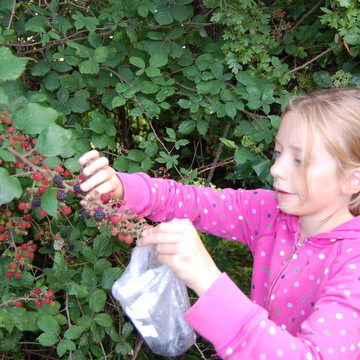
Jane: Last weekend the children were camping, so Mal and I went hedgerow picking with a step ladder. Ooh, it made life much easier. We could reach all the sloes and lovely juicy blackberries that everyone else had left behind. I’ve just bought a fantastic book, Hedgerow Medicine, which shows you how to make teas, tinctures and balms from the plants that are all around us. But I started off with hedgerow jelly:
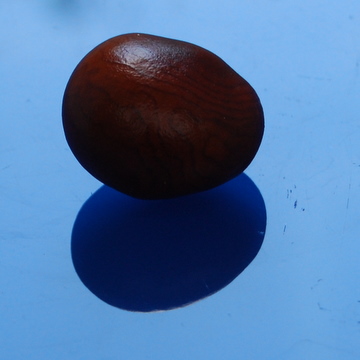
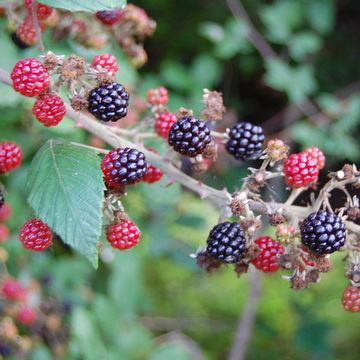
Hedgerow Jelly This has a lovely delicate flavour and despite the sugar can even be called healthy (hawthorn especially is good for lowering blood pressure and cholesterol). I used a mix of sweet (blackberry), bitter (sloes) and sour (rosehips, hawthorns) flavours but you can use any hedgerow fruits including rowan berries. Always use the same amount of cooking apples as other fruit: they provide the pectin to set the jelly. 1kg cooking apples 300g blackberries 250g sloes 100g elderberries 150g hawthorn berries (haws) 200g rosehips About 2 litres water, to cover 2kg granulated sugar Wash the apples and cut into big chunks, leaving the skin, pips and cores on. Strip the fruit from the stalks (no need to top and tail) and rinse. Put all the fruit into a big preserving pan, and cover with water. Bring to the boil, then simmer until the fruit is soft, about 45 minutes to an hour. Put the mixture into a muslin-covered sieve or three-legged jelly bag and leave to drip into a pan. This might take an hour or more but don’t hurry it – if you squeeze the bag the jelly will not be clear. Measure the juice, then return to the pan. (Make sure the pan is only half full: if you have more juice than that, do a second boiling.) Add in 500g sugar for every 500ml juice.
Heat the pan gently, stirring until all the sugar is dissolved. Then bring to the boil, skimming off any white scum that forms on the top. Turn the heat down, and leave to simmer uncovered until setting point (105ºC, 221ºF) is reached, usually about 10 to 15 minutes. I use a thermometer or you can try the wrinkle test: place a teaspoon of jelly on a cold saucer (keep in the fridge), leave to cool for a minute, then drag your finger over – if the top wrinkles, it’s ready. (Always take the pan off the stove while doing this to avoid overcooking, which loses the set.)
Pot into warmed sterilised jars and immediately place a wax circle on top (wax side down), and seal. Store in a cool place. Tie a pretty ribbon round and label. 24th Sep 2008
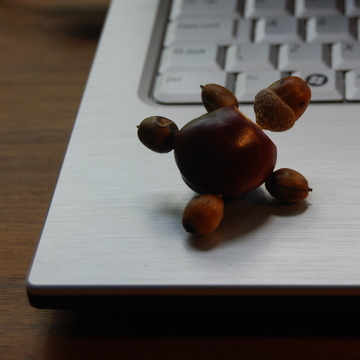
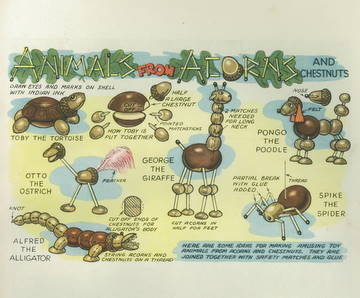
Tamsin: I found these ideas for conker and acorn animals in a 1940s 'Helen Haywood Christmas Book for Young People' (see below). They looked so nostalgic and enticing that as I cycled into town this morning I gathered a basket full of conkers. The acorns were another matter - in fact I think they should go on the endangered seeds list. I managed to find a few rather old-looking ones beneath a magnificent oak tree, though its branches seemed to have no plump green acorns at all. I hope you have better luck.
After 30 minutes trying I eventually managed to produce Toby the Tortoise, or rather a poor cousin of his who seems to enjoy dancing (first picture above). For young ones, I would suggest a lot of adult help, using cocktail sticks instead of matches, and making holes to poke them in with a thick needle. I will be impressed with anyone who manages to make George the Giraffe or Alfred the Alligator, especially his teeth.
Still, it's always worth picking up the odd conker as they are beautiful...
21st Sep 2008
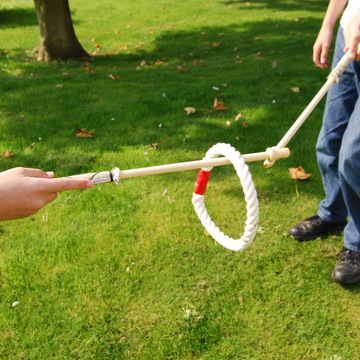
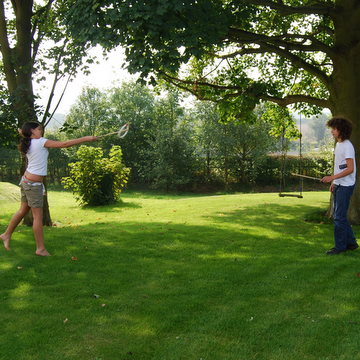
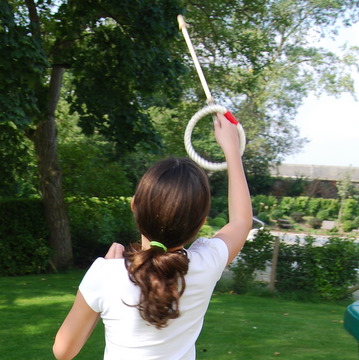
Tamsin: I had heard of Deck Quoits but never Catch Quoits, until I came across it while visiting a museum with the children in the summer holidays. In the outside area the staff had set out some games for visitors. Looking into the box I saw what I thought were some safe swords for mock fighting. But Joe, who cleverly bothered to read the instructions I'd ignored, informed me that it was actually a Quoits game.
I remained puzzled for a bit as I hunted for the ground pegs to throw the Quoits over. Then I slowly realised this was a game of ‘throw and catch’ with the Quoits being thrown between the two players who catch them on their sticks (the safe swords!).
Joe and I started a game throwing one Quoit between us, and when we felt we'd grasped that pretty well, we dared to have two Quoits up in the air at the same time, with each person throwing one to the other so they crossed midway.
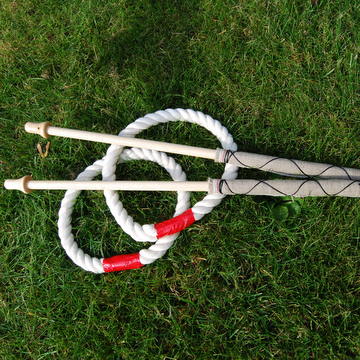
I thought it would be good to make a Catch Quoits set at home, as I've never seen one in a shop. So I went along to my local DIY stall and managed to get all I needed. Joe sawed the wood for me, Carla helped with the tape and within 15 minutes we had a set of Catch Quoits. If you feel like having a go yourself I have explained how we did it here – it could even make a nice unique present for someone.
19th Sep 2008
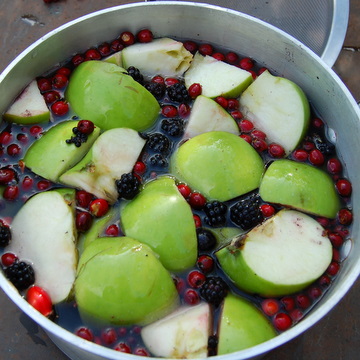
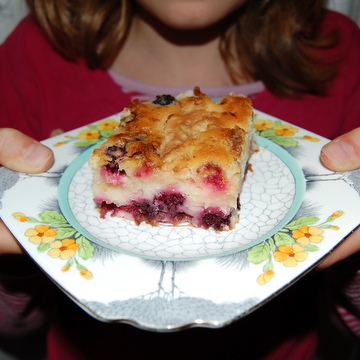
This is delicious hot, but even better cold a day or two later.
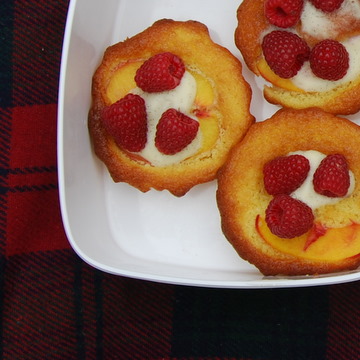
4 cooking apples (about 800g) Juice of a lemon 285ml whipping cream 175g butter 225g caster sugar 3 eggs 300g plain flour 300g blackberries 1 tbsp dark brown sugar for sprinkling Heat the oven to 200 degrees C, Gas Mark 6. Grease a 30cm by 20cm roasting tin with a little butter, then dust lightly with flour. Peel and core the apples, then slice them into rings. Toss them in the lemon juice to stop them browning. Put to one side. Put the cream and butter in a pan and bring to the boil, then set aside to cool slightly. Meanwhile, whisk the caster sugar with the eggs until they turn pale. Whip the cream mixture into the egg mixture, then fold in the flour until completely smooth. Pour a thin layer of the mixture into the tin. Then lay the apple rings over, and sprinkle the blackberries on top. Pour the rest of the mixture over the fruit – it will only just cover it. Sprinkle the dark brown sugar evenly over the top. Bake for 45 mins to an hour (depending on your oven) until golden. Leave to cool in the tin then cut into squares. Also try our Blackberry Polenta Cake.
14th Sep 2008
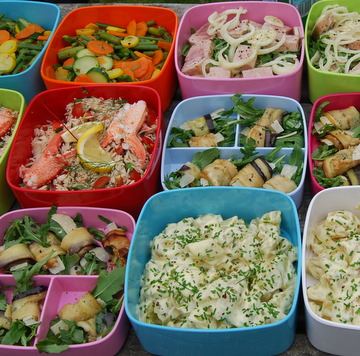
Tamsin: The family is getting older, my son is taller than me and my daughter is fitting into my shoes. I've hit the teenage years, or rather they have crept up on me. Every so often, I suddenly find myself having to readjust my mothering technique as I am jolted into a new phase. This summer gave me one such jolt, but luckily I found that the adjustment was only slight. It all began because I had booked us on to a cookery course at The Olive Tree Cookery School, which had opened up near our annual holidaying spot. As a holiday group we were a party of eight, two families ranging in age from 11 to 49.
The night before I suddenly realised I was not taking along a group of ‘children’ but independent-minded young adults and I wondered if we could still go on an activity together and all get enjoyment from it?
We were in very good hands with our chef and teacher Giuseppe who immediately relaxed us by sitting us down with a cup of coffee while he talked through how the morning would work. Each person took on a cookery task and began to prepare their dish while Giuseppe supervised, making sure we were all on target – I felt he was the leader in charge of a rather dishevelled but willing orchestra and conducted us perfectly.
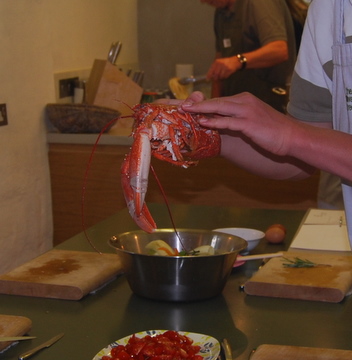
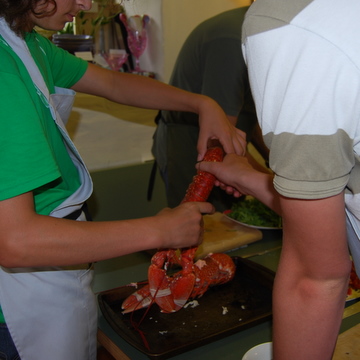
The realisation that enjoyment was certainly going to be spread to everyone came when the lobsters were brought out. Immediately, the 14 and 16-year-old were hooked, dropping them into the pans of boiling water (probably regretting that Guiseppe had humanely killed them first), cracking open the shells and pulling out the contents.
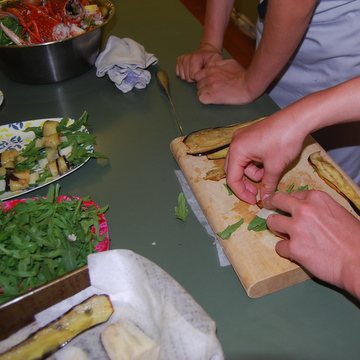
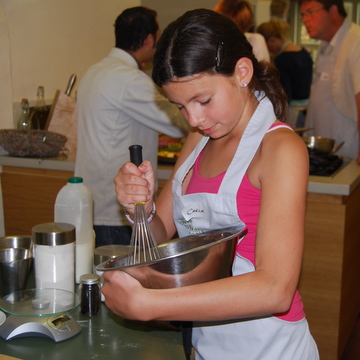
For those of us who were a bit more squeamish, there were plenty of other jobs and we all found our niche. Carla concentrated on pudding (her favourite), Emma and Andrew the mayonnaise and salads, Mike the aubergine rolls and Nienke the fiddly vegetables.
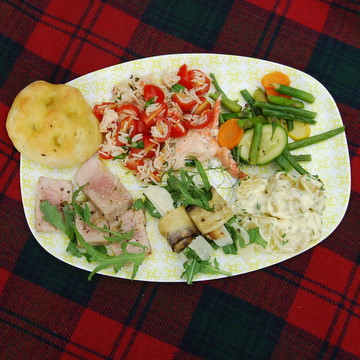
The result was a picnic which was a real feast for the eyes as well as the stomach.
The greatest praise was a whispered comment from one of the teenagers – ‘I’m in danger of really enjoying myself!’ A good result indeed. Not only did we take away a delicious picnic but I also made the firm decision to carry on booking ‘family’ experiences over the next few years, feeling confident that this will enhance us all. Mind you, this belief was tested a short while later when I booked us all to go to the circus ... but that is another blog!
11th Sep 2008
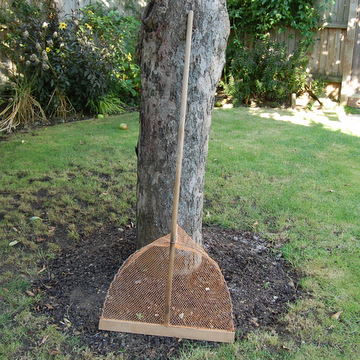
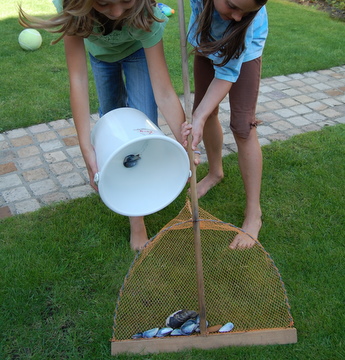
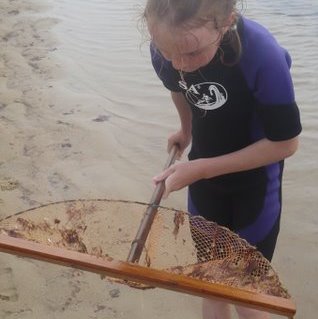
Jane: Any one for shrimping? Okay, we might at the fag end of the season but it’s still worth a go. This summer, my neighbour Gill rediscovered her lovely wooden shrimping net from childhood: it’s 40 years old and as you can see, in pretty good nick. As a child, she used to go shrimping on Happisburgh beach in north Norfolk with this very same net, and this year took her children to Waxham Sands near Great Yarmouth to see what they could catch.
The net is a good solid one with a flat edge at the bottom which you push along the seabed in a few inches of water when the tide has gone out, as shown above. The shrimp, tiny flatfish, starfish, crabs and loads of other kinds of marine life are scooped into the net.
You can see Jasmin holding a brown shrimp, a wiggly translucent thing…
Collect the shrimp in buckets as shown here (Millie and Edie are practising their mussel technique in the garden)…
The children were horrified but Gill and her mum cooked the shrimps on the campfire, then ate them with buttered brown bread and a sprinkle of white pepper. (To cook, you put the shrimp in heavily salted boiling water for three to five minutes until they turn pinkish. Take the heads off before you eat them, but crunch the other crusty bits.) Or like Millie and Jasmin, you might feel happier chucking them back into the sea… 4th Sep 2008
Tamsin: We're always being told to let children help with the cooking, but I have never found this an easy thing to do. This is certainly a failing as a mother and has something to do with being a control freak when it comes to my (and I see it as ‘my’, not the family's) kitchen. It also has to do with the amount of mess that can be produced by children (and some adults) whenever you let them near the mixing bowl. But I know the advice is right, so I take deep breaths and let people into my domain, not least since cooking is such a passion of mine that I want to pass it on to my children.
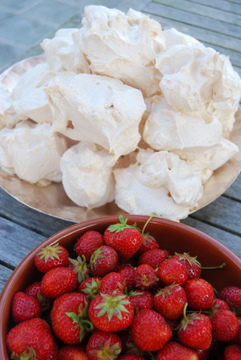
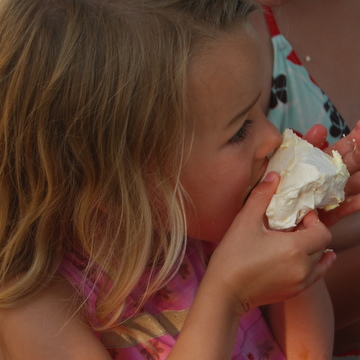
This summer we had my nieces aged four and six to stay and we all made fluffy meringues together, which was great fun and a really good activity to do with younger children. I first set them up on the floor of the kitchen as the work surfaces are too tall and we don’t have enough stools. They cracked the eggs and I divided them. Then we took turns whisking them with the electric whisk, making sure that the whites were fluffy and firm before we began to add the sugar. The ratio of sugar to egg whites is 50g caster sugar to every 1 egg white. Now, this next part cannot be hurried. Add 1 to 2 tablespoons of sugar to the egg whites and beat well before adding another 1 to 2 tablespoons sugar – carry on in this manner until all the sugar is all incorporated. This method of adding the ingredients worked well with the younger ones as there was plenty of opportunity for turn-taking, whether whisking or adding. By the end you should have a glossy, thick white mass which can easily be scooped out using two spoons, and placed on a tray with baking parchment on it, into two meringue blobs. (There is no correct shape for a meringue blob and they do not need to be too regular, so let the children make them as they like.) Place in a cool oven (150 degrees C/Gas Mark 2) for however long it takes for them to dry out. Check after 30 mins that they are not browning too much, if they are, turn down the oven a bit. Over all they should be ready after an hour but you can keep them in there for another hour if you want.
Eat with plenty of soft fruit and cream.
|

|